DIY rack-mounted laptop
Do you have any old hardware lying around your house? I certainly do. I have an old VN7 gaming laptop that suffered a serious drop a few years back, and it was immediately replaced by a smaller, lighter machine.
The damage was in a critical spot where both the power supply and the monitor connected. As a result, it didn’t take long for it to completely fall apart after the drop:
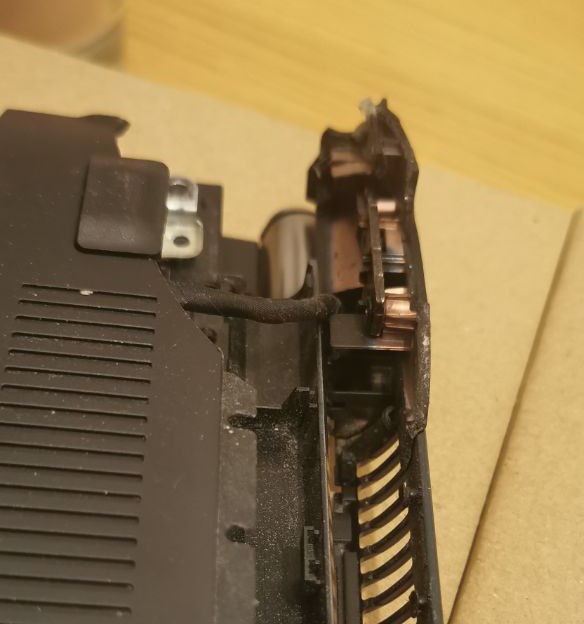
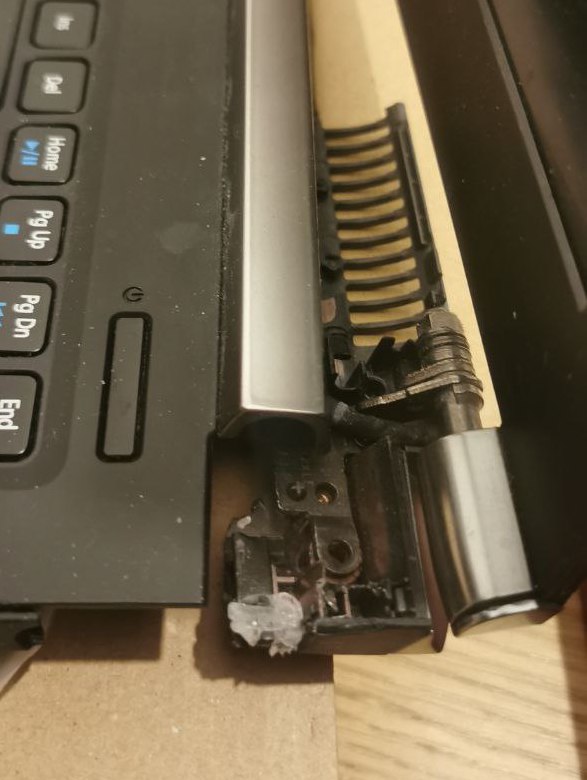
However, this laptop had pretty decent specs for its time, so it seemed like a waste to just let it gather dust.
I already run a home assistant instance that manages also additional Docker applications. Recently, I found myself in need of a slightly more powerful machine to use as a development server. The timing couldn’t have been more perfect!
I soon discovered that server hardware is prohibitively expensive. A 1U chassis ranges from 50 to 100 EUR, which is quite costly, especially considering the additional modifications needed, like drilling extra ventilation holes. Plus, I already had some spare rack parts at home, so I decided to build one myself instead!
Shopping list
- an angled C5 power cable for the laptop’s power supply: here. Being angled saves some useful space.
- an angled USB micro cable to connect the monitor display here. Being angled saves some useful space.
- a momentary switch like this.
- a status led like this with its holder.
- an arduino-compatible board, plus some headers and cables. I used an old Arduino Micro, which I had lying around. Any board will do, as long as it supports serial communication via USB.
- a tiny OLED screen, like this.
- 2020 or 2040 aluminium profiles work magic. I used two 2040 250mm and one 2020 500mm which I cut to size.
- a few corner brackets. Either external ones, or hidden ones.
- a bunch of machine screws. Those can be found in various lengths here, I used mostly M3 and M5 screws in 8, 10 and 16mm lengths. And a bunch of T-nuts, like these or these.
- a bunch of threaded nuts like those.
- a couple of metal, wood or acrylic panels. I used one of these on one side, and a sheet of transparent acrylic I had laying around. I’ve chosen the ones made of perforated aluminium because of a few perks: it’s almost of the right size, the perforation adds ventilation for free and makes it easier to cut at home.
Tools
- drill
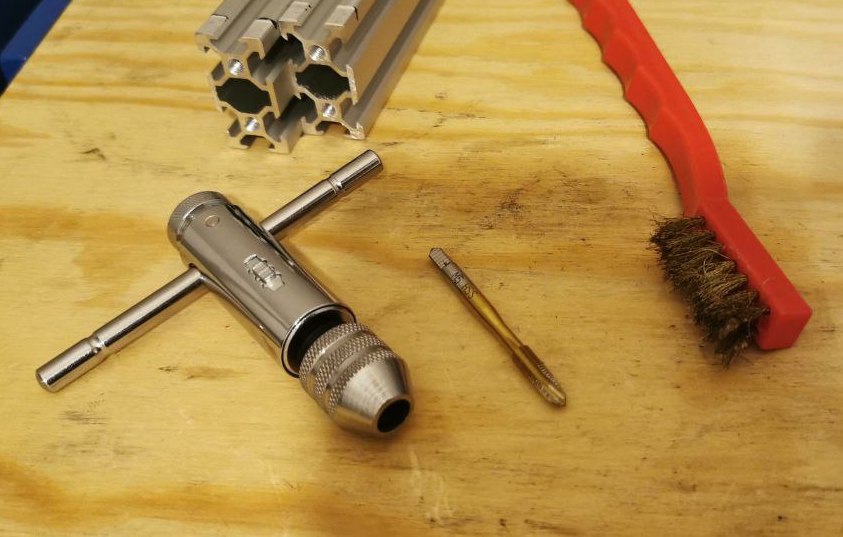
- tapping tool. If you know what that is, you may already own one. If not, it’s required to tap for M5 screw into the 2020/2040 profiles, and here’s a cheap one which could last for a couple of uses :-D (I’d suggest you get a proper one, or at least one with a longer handle).
- files and something to cut metal, to cut a hole in the blank panel for the monitor.
- 3d printer
Planning and tests
The primary function of this machine will be to serve as a development server, which means I’ll mostly access it remotely from another computer. Additionally, it will operate various other software programs, and I want to be able to monitor the machine’s status easily.
I plan to achieve this through two methods:
- Transmitting its metrics to Home Assistant using MQTT.
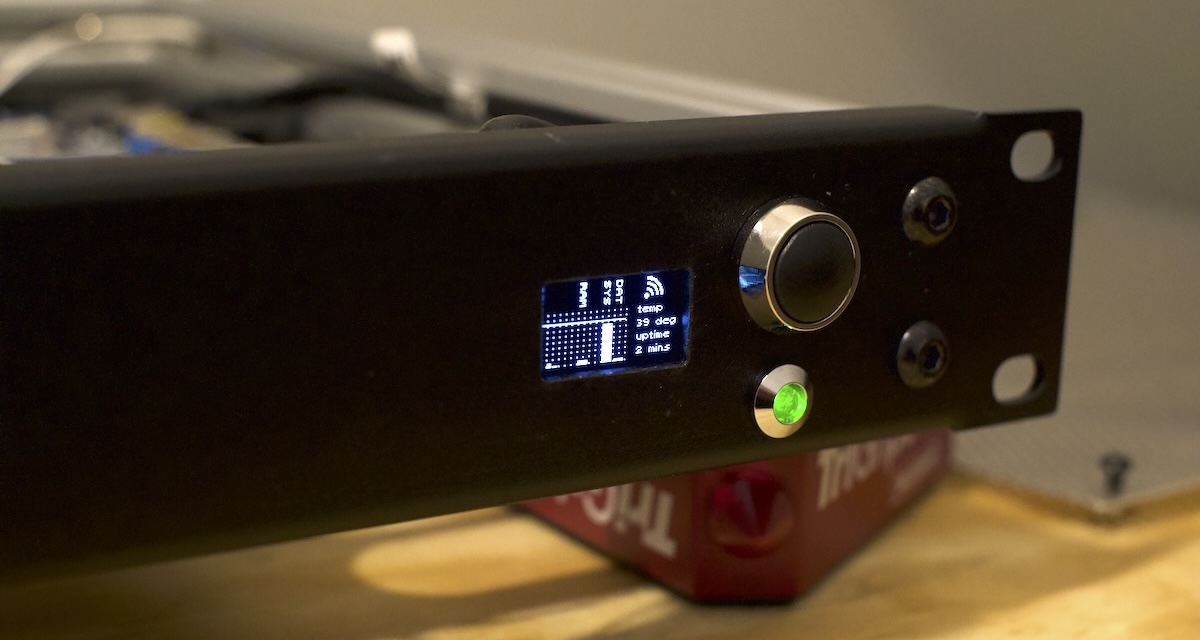
- Utilizing a visible, physical status monitor to quickly assess the machine’s health at a glance.
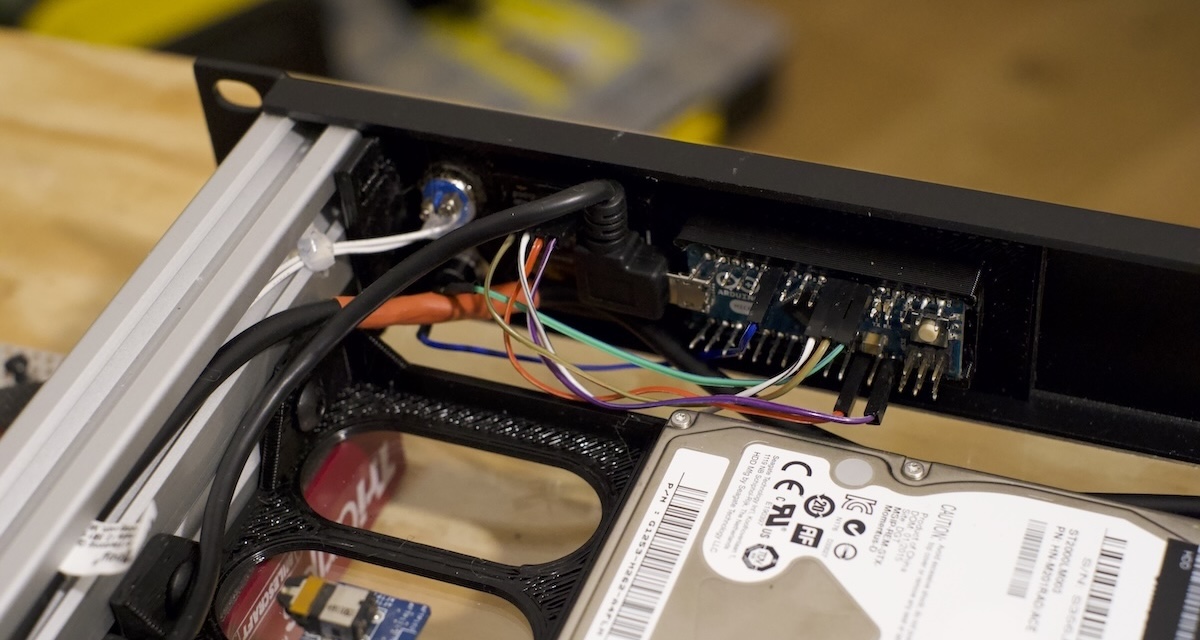
Before beginning to construct the parts, I needed to verify if the monitor setup was feasible. Therefore, I decided to add some wires and give it a try.
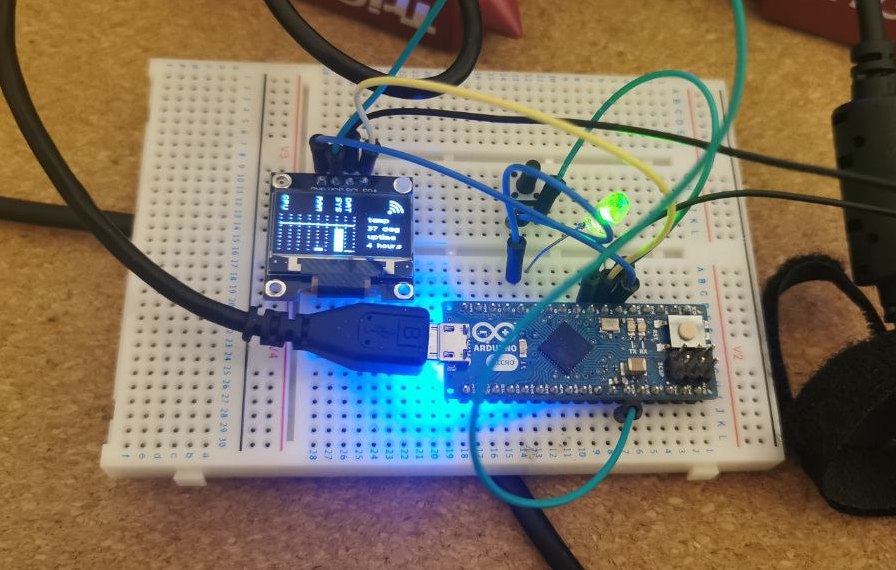
How does it work?
A Python script performs checks on:
- Disk space
- CPU temperature
- Available memory
- Network status
This script then sends that information to the Arduino board through the serial channel. It also connects to a MQTT server which runs on Home Assistant to send it metrics about the machine.
The script runs as a service, starting at server boot, and is maintained actively.
The code on the Arduino board executes several tasks:
- It receives status information via the serial channel.
- It plots metrics onto a grid.
- It displays icons based on the network status.
- After 10 seconds of idleness, it shows a waiting page, useful if the system goes down or disconnects.
- It controls an LED, turning it on or off depending on whether the host machine is transmitting data.
I might write a separate post about this in the future, as there are numerous interesting details involved.
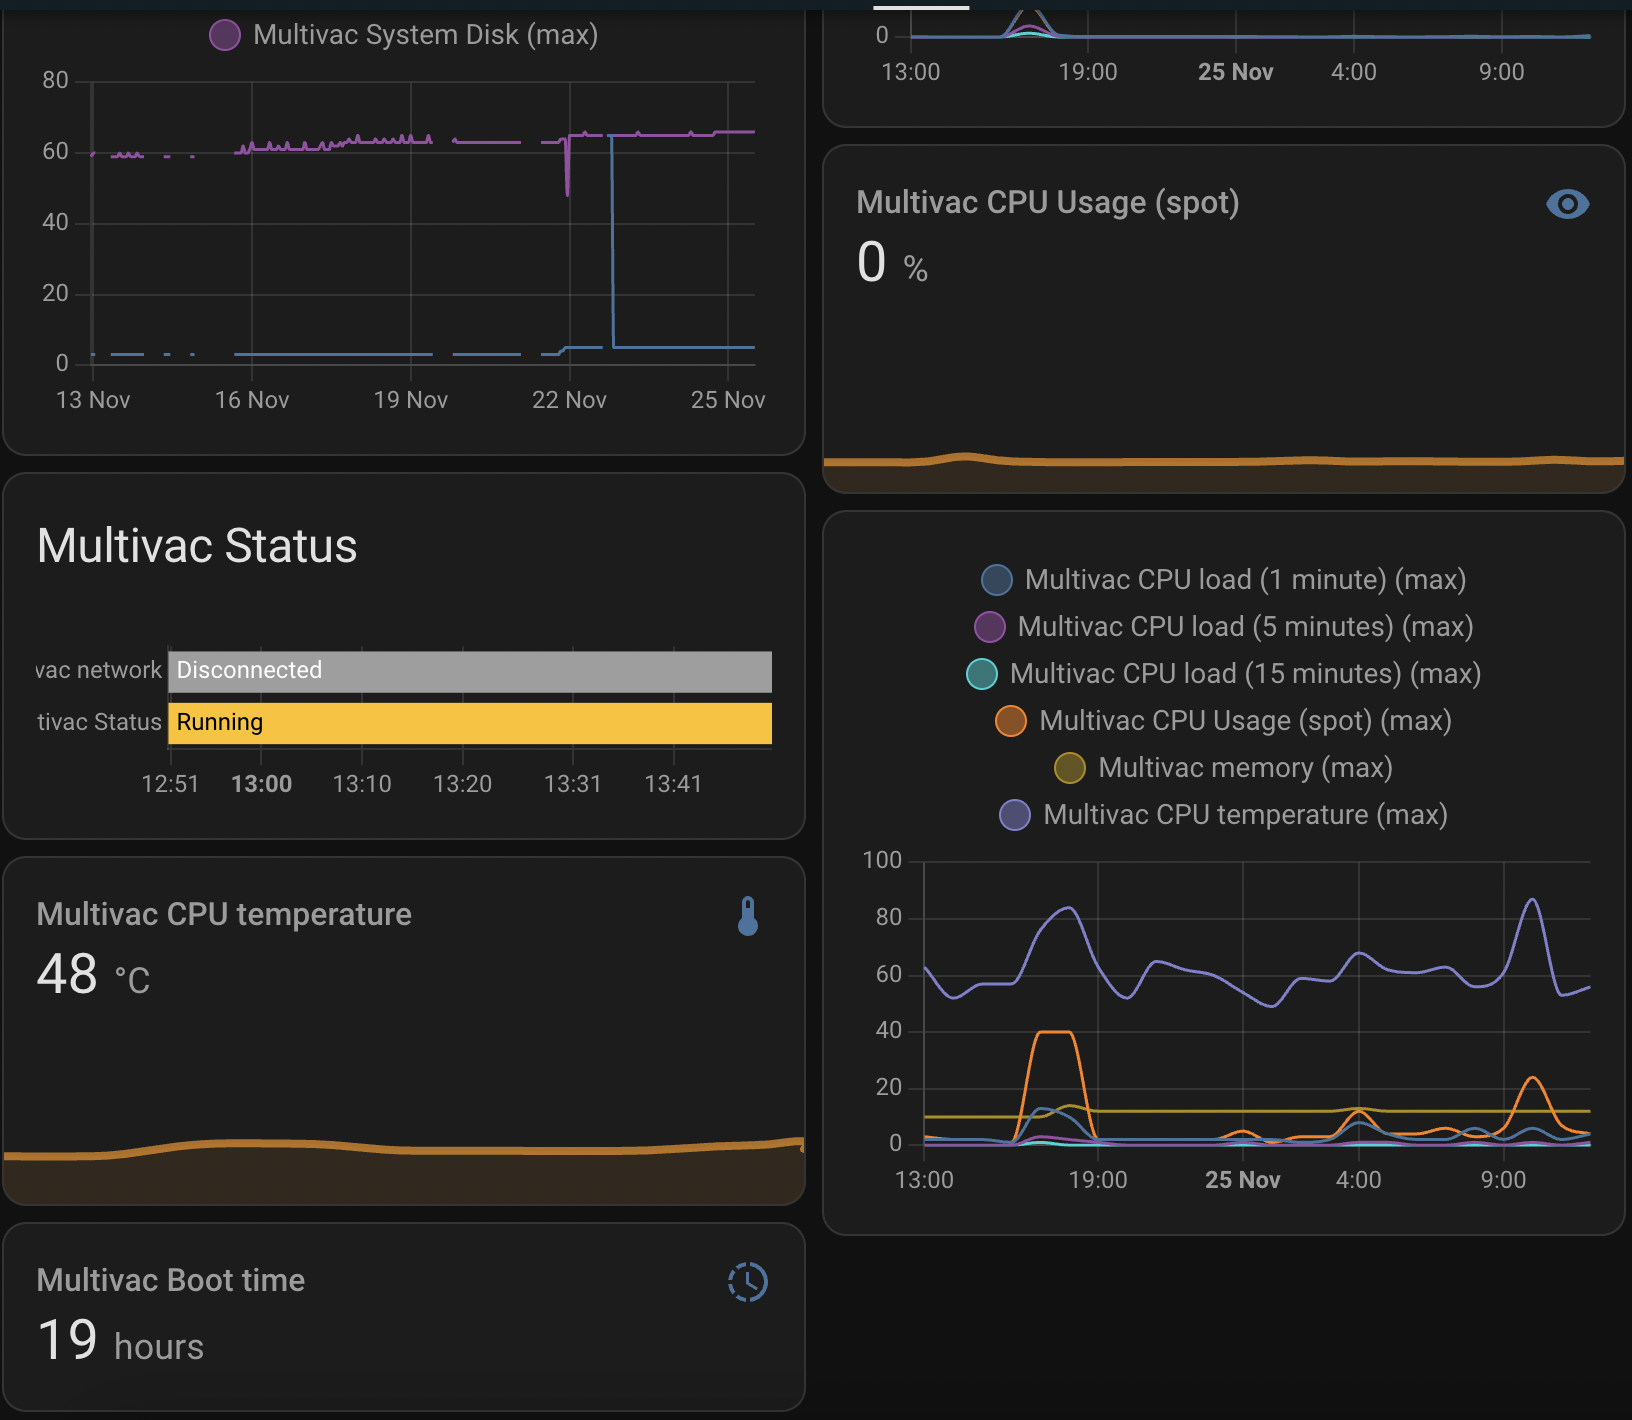
Once connected to MQTT, I can display metrics about it in Home Assistant:
Great! Now, software works, time to build a chassis for it!
Building the chassis
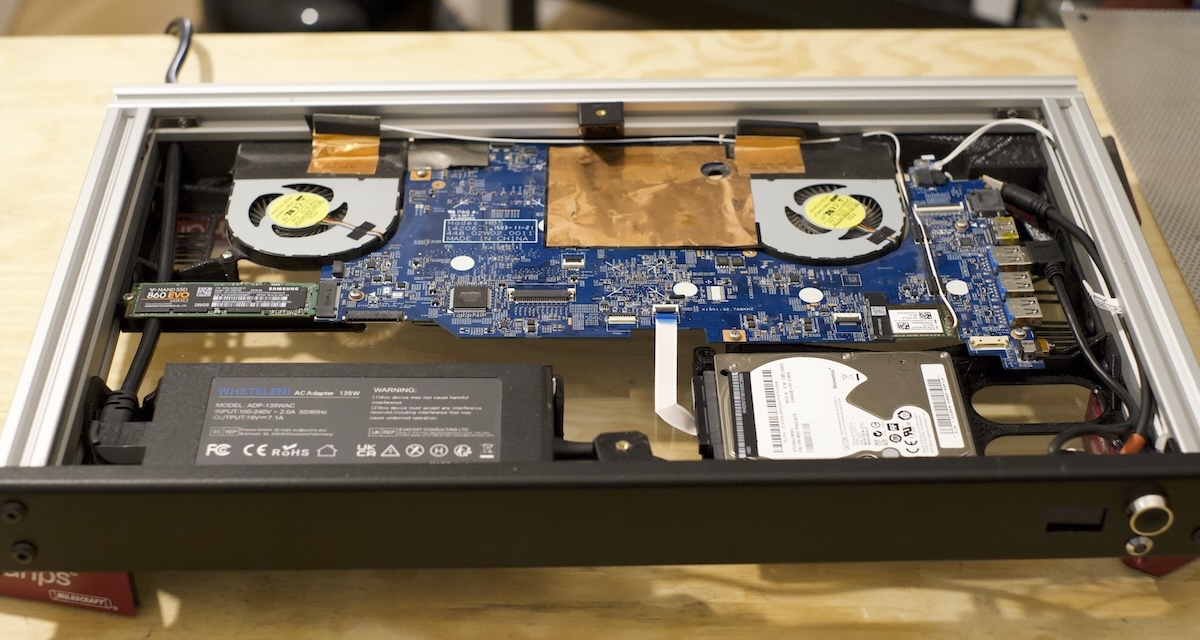
The chassis is constructed by combining aluminum profiles into a sturdy frame, which will be enclosed by one metal and one acrylic panel. 3D-printed parts will close the back and secure the disk, motherboard, and power supply in place.
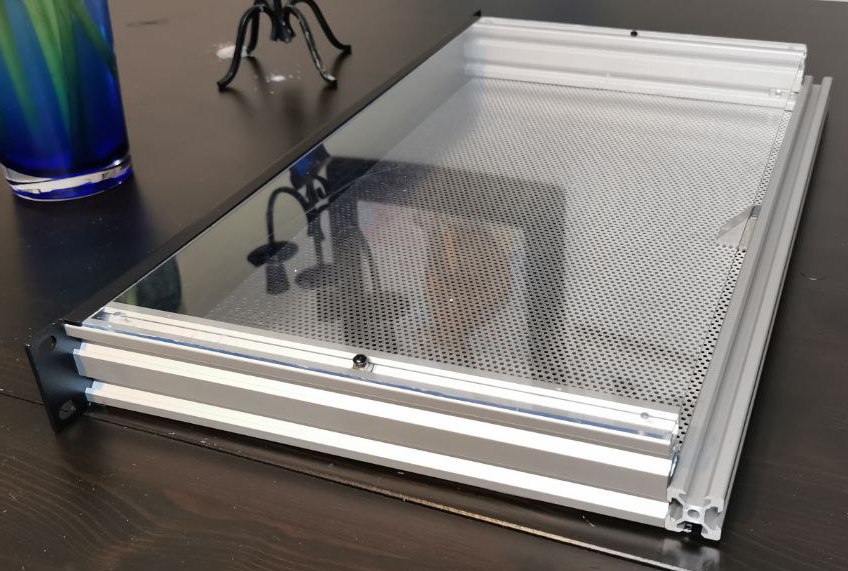
To try out whether the assembly was rigid enough, I assembled the two 2020, 2040 cut to size and the panel together with a few corner brackets and screws. This requires tapping the central hole of the 250mm profiles and drilling four holes in the 19” rack panel.
Regrettably, I forgot to take pictures of the entire process.
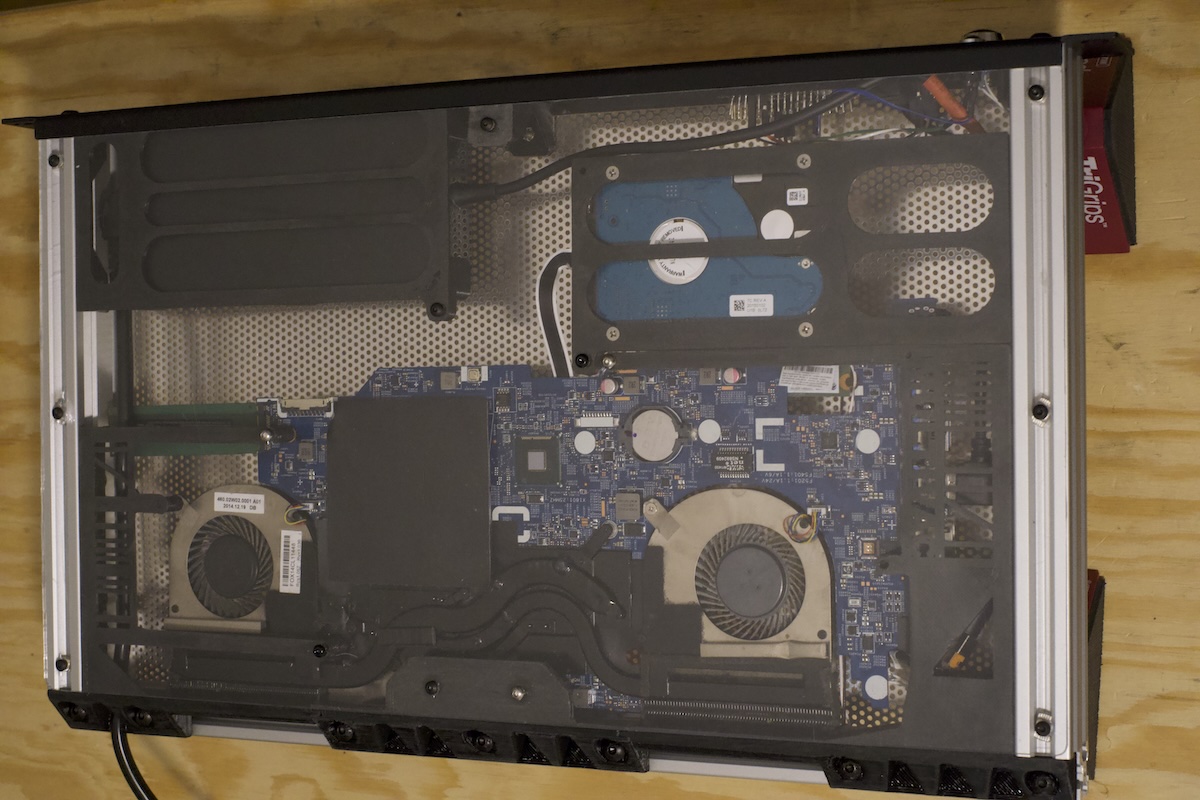
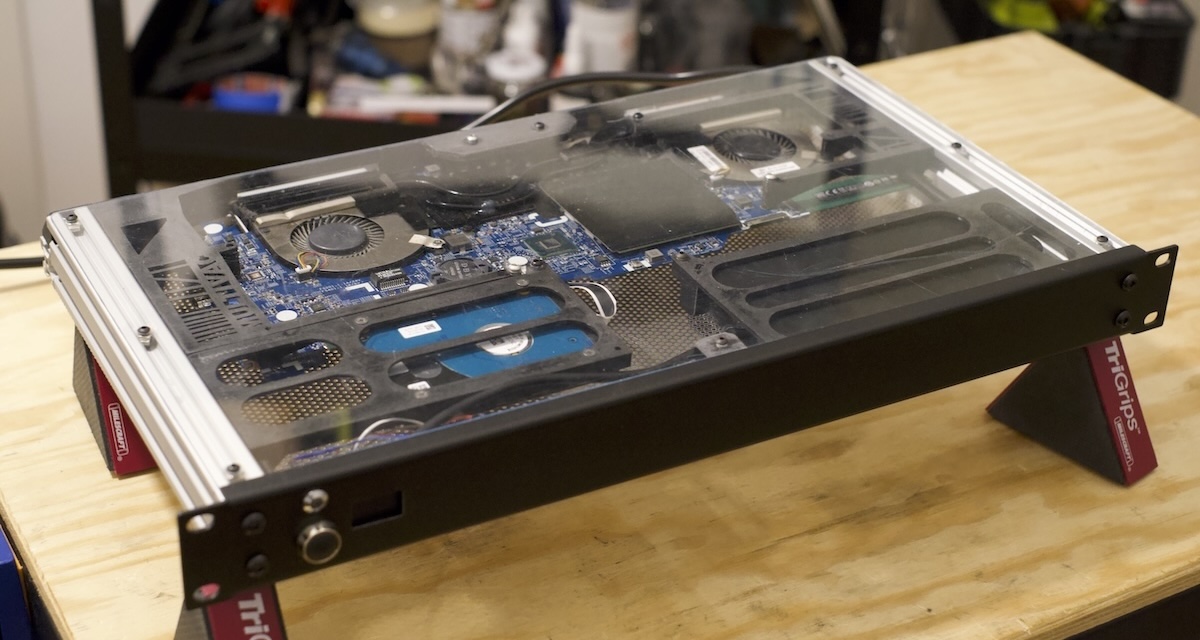
After drilling a few holes and cutting the two panels to size, here’s a preliminary look at the chassis:

Now, it was time to design some plastic parts.
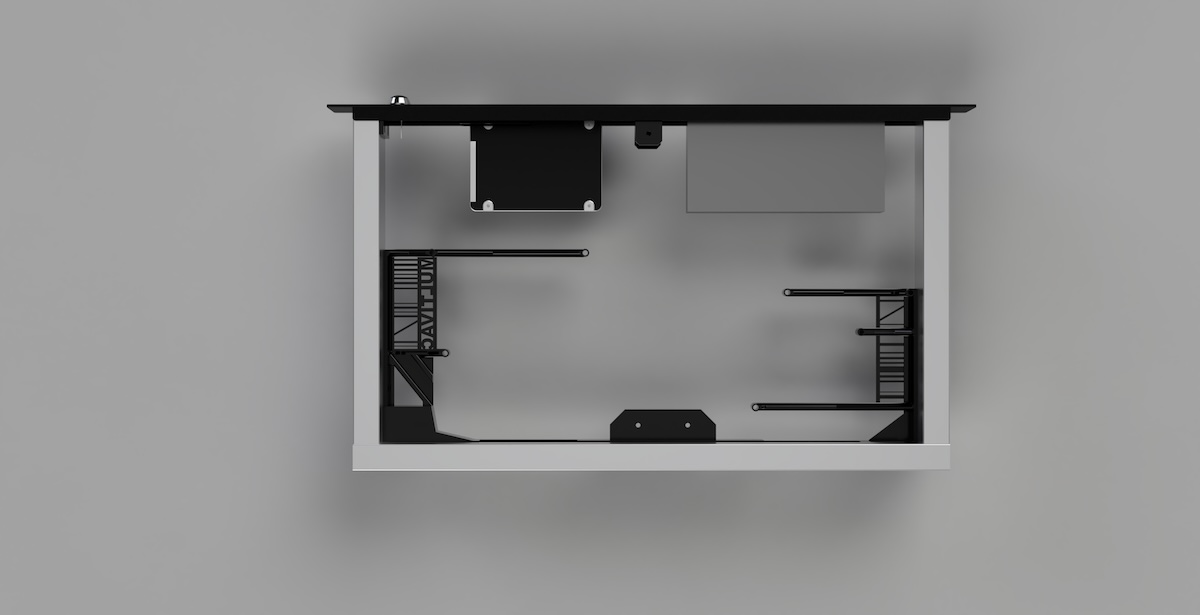
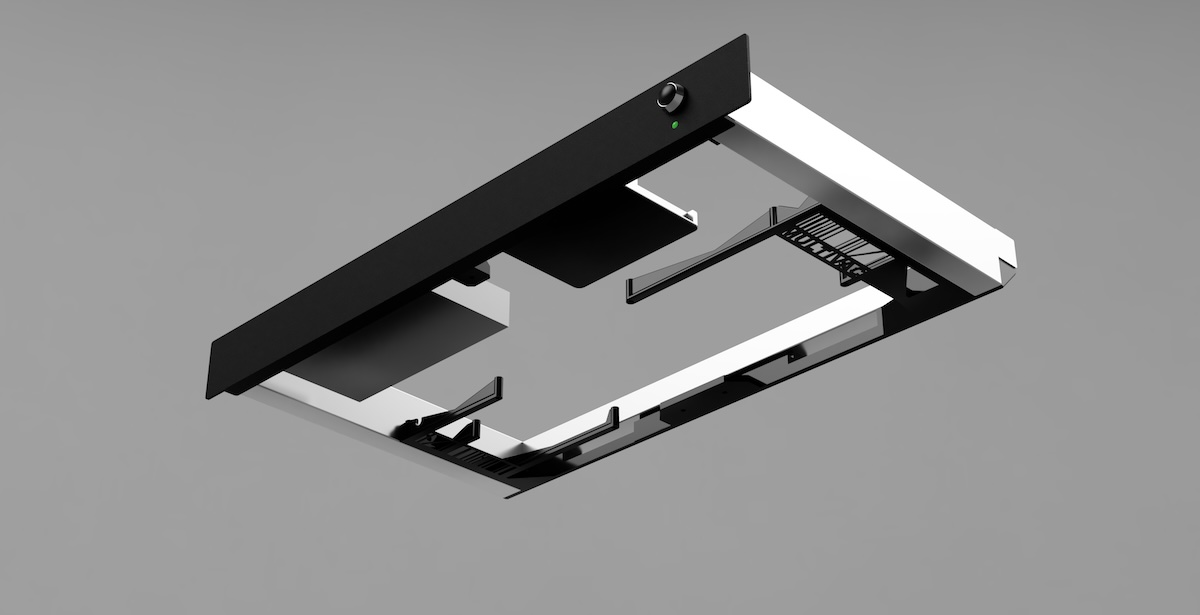
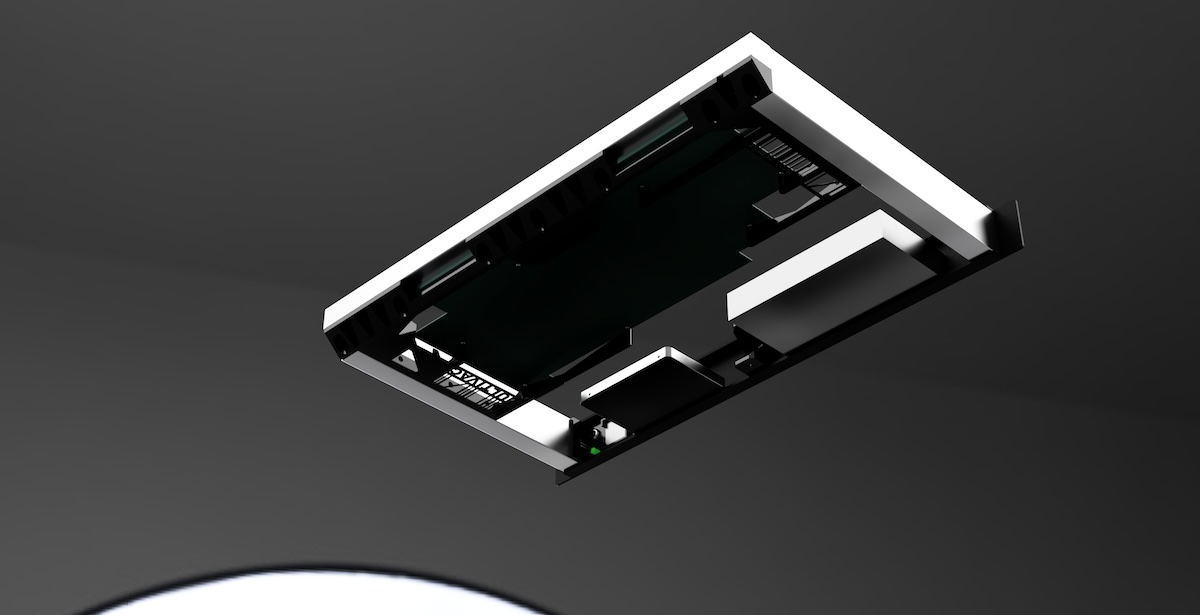
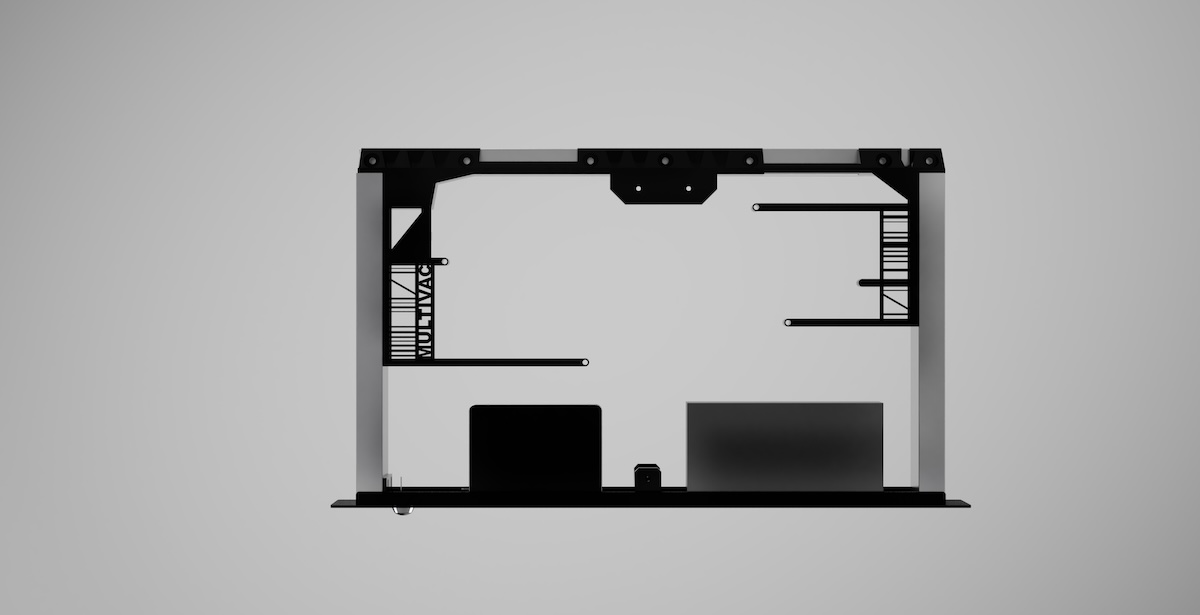
For this, I traced the laptop motherboard’s outline onto paper. I measured the dimensions of both the chassis and the motherboard, then began drafting a design in Fusion 360. After a few iterations, the final render looked like this:

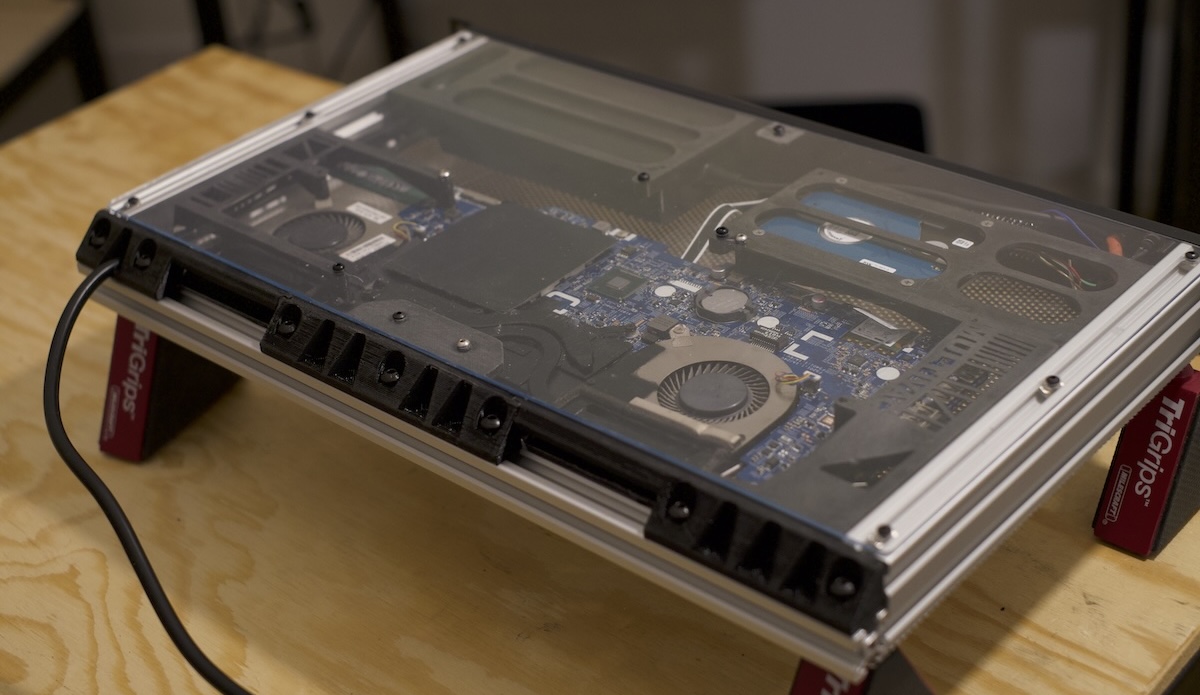
Final assembly
Here’s the final result with everything assembled and securely bolted: looks neat, doesn’t it?