A case for a Nanopi M4 NAS
I realized it could be nice to show some more context of where my previous design comes from.
Deciding to mount it on a PC case was actually only the last phase of a fun design journey which left me some learnings (and more spare parts then I have wished).
This project begins a few years back when I was looking for a better way to backup my personal data and my pictures. I’m not going to spend much time on the solutions I’d found at the time, since most of them would probably be outdated anyway. Instead, I’ll show some of the steps I took into designing the case for it since it’s the most fun part to me anyway.
Hardware choices
My plan was to host:
- a media server
- a home automation system
- a retro-game hub
- a file-sharing server
So I was looking for a Raspberry Pi 4 alternative or a x86 board which would have had the following specs:
- some kind of fast BUS to attach multiple SATA discs to it
- some kind of video output
- a small footprint
Apparently none of the boards available to me at the time seemed to have any decent combination of those to my likings.
After a bit of research, I decided to go for a FriendlyElec NanoPi M4, a RK3399 SoC based ARM board. It has the same form of factor as the RPi B3+ and has ports and interfaces compatible with RPi B3+ too.
The board exposes HDMI output and the standard LAN + 4 USB3 configuration. It has 2 external antennas for Wifi & Bluetooth.
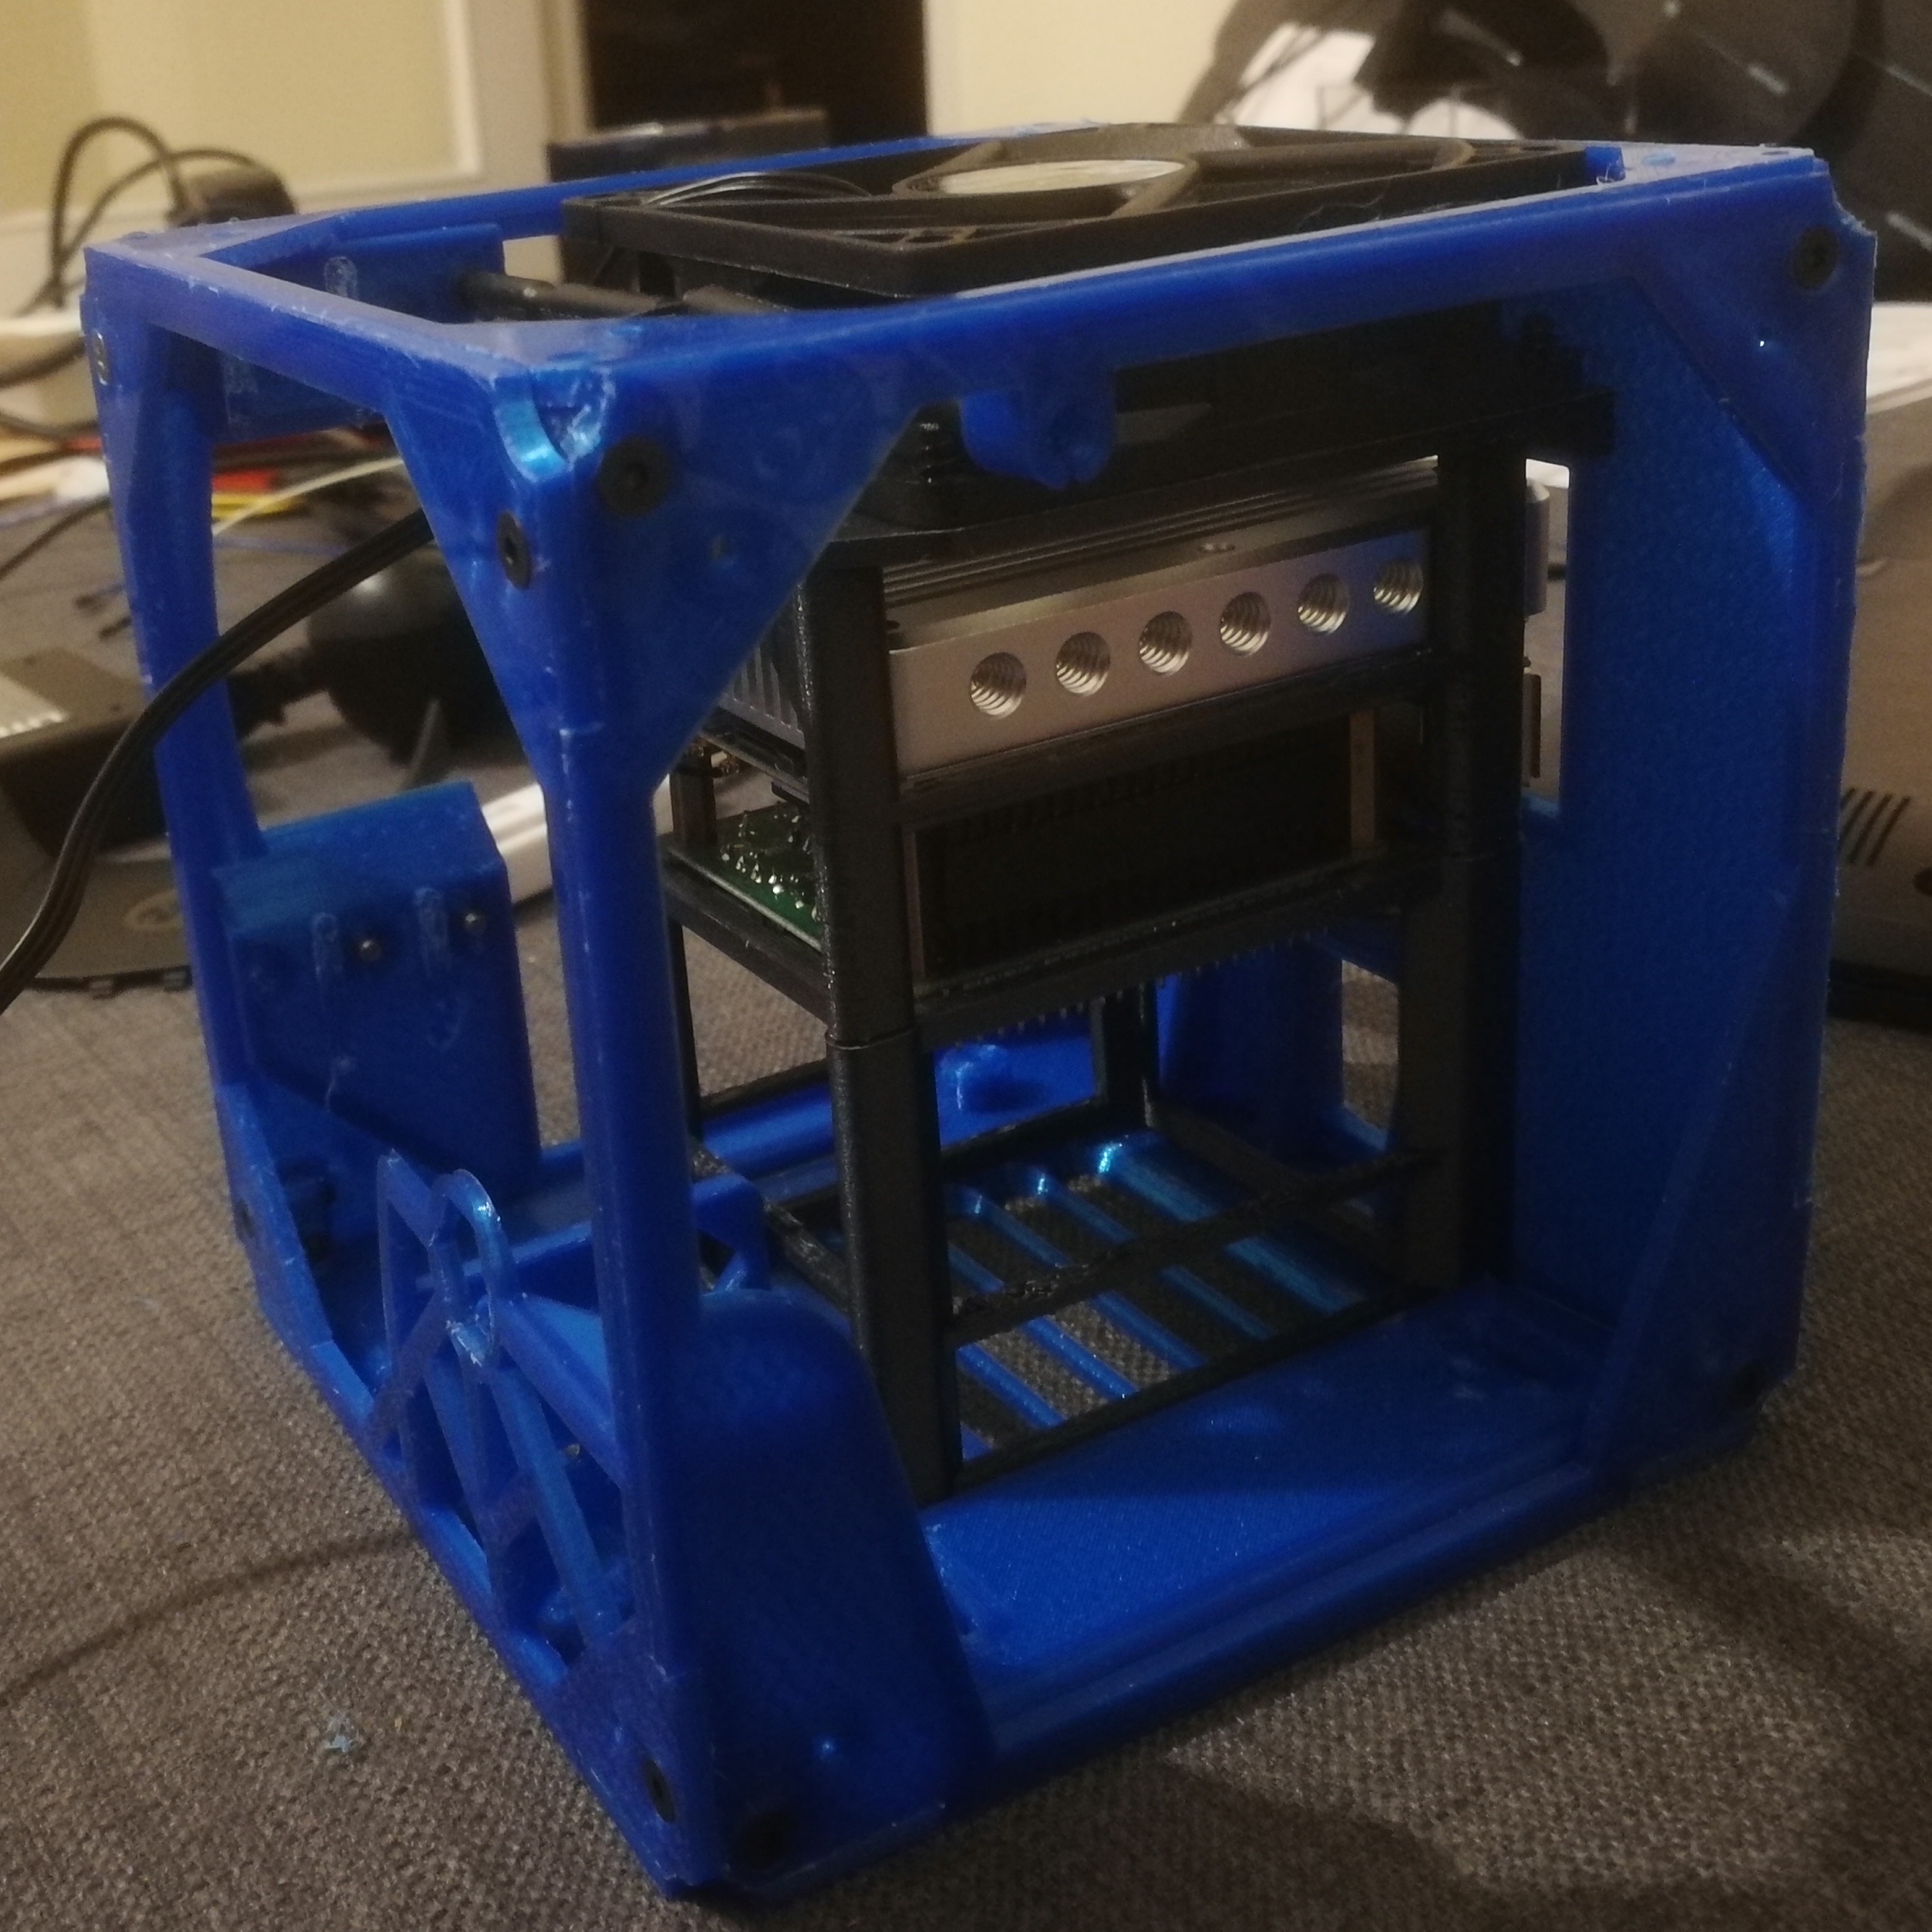
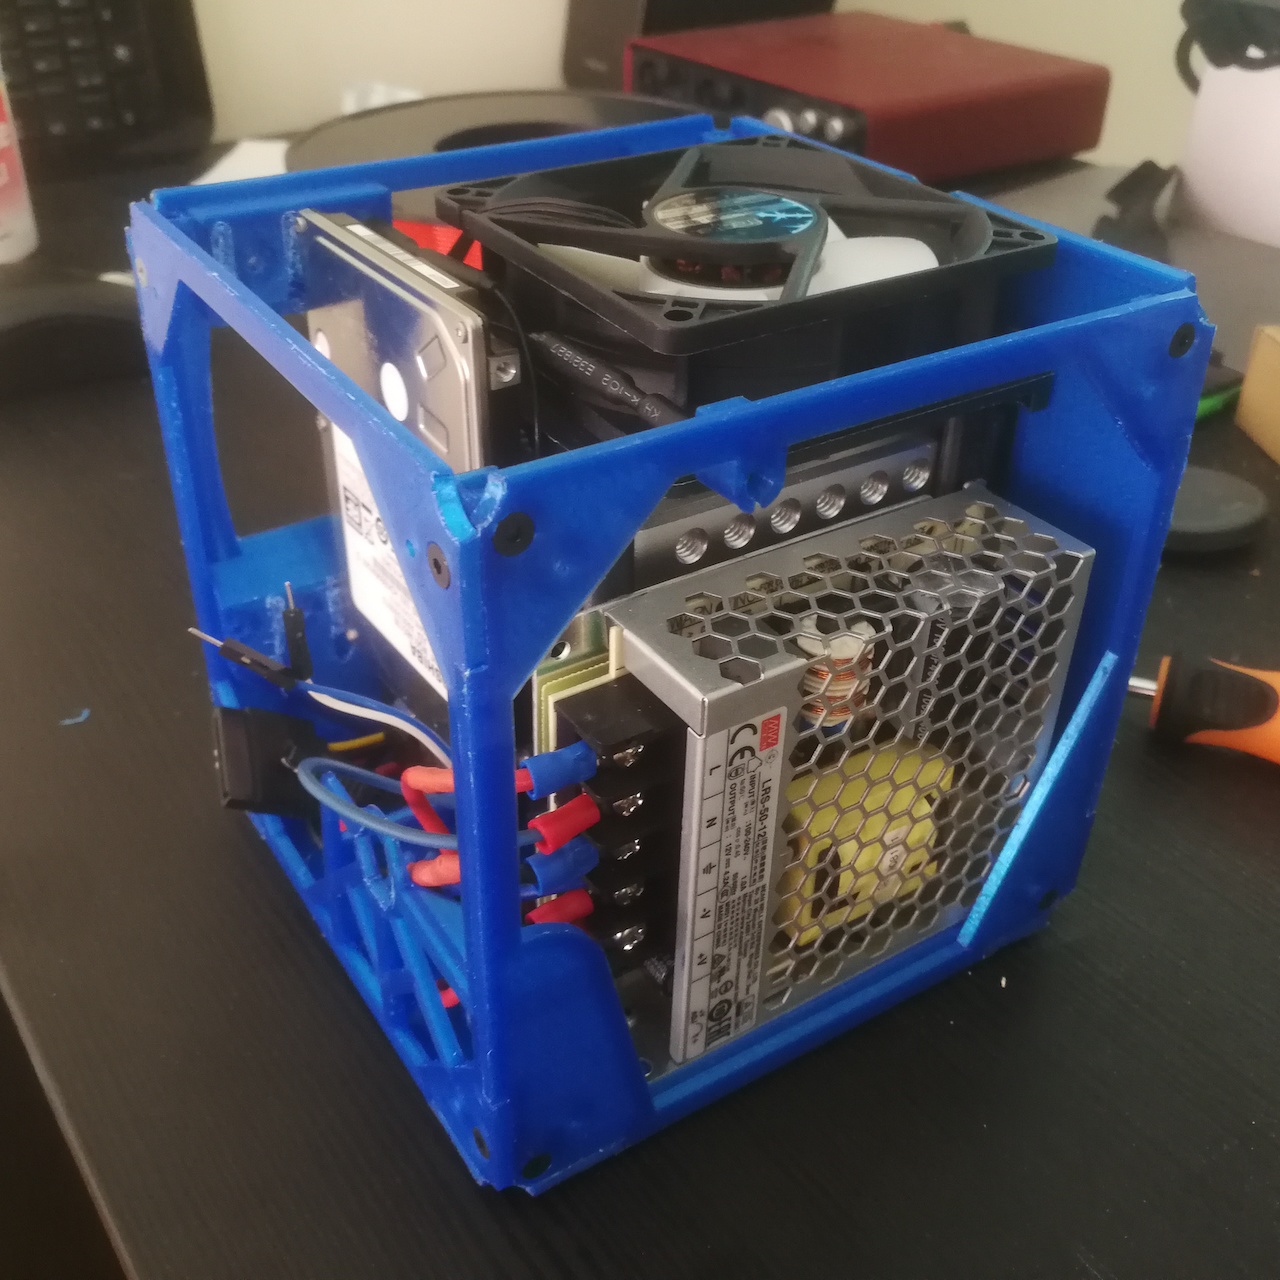
I added then a heat sink, an additional 16GB eMMC 5.1 Module for quicker booting and and RTC battery. On the storage side, FriendlyElec’s SATA HAT provided 4 SATA connections directly hooked in the PCIe bus, and 12V power supply input. I threw a Meanwell LRS-50-12 power supply on top and I was set. I just needed a case.
Studies
Earlier versions
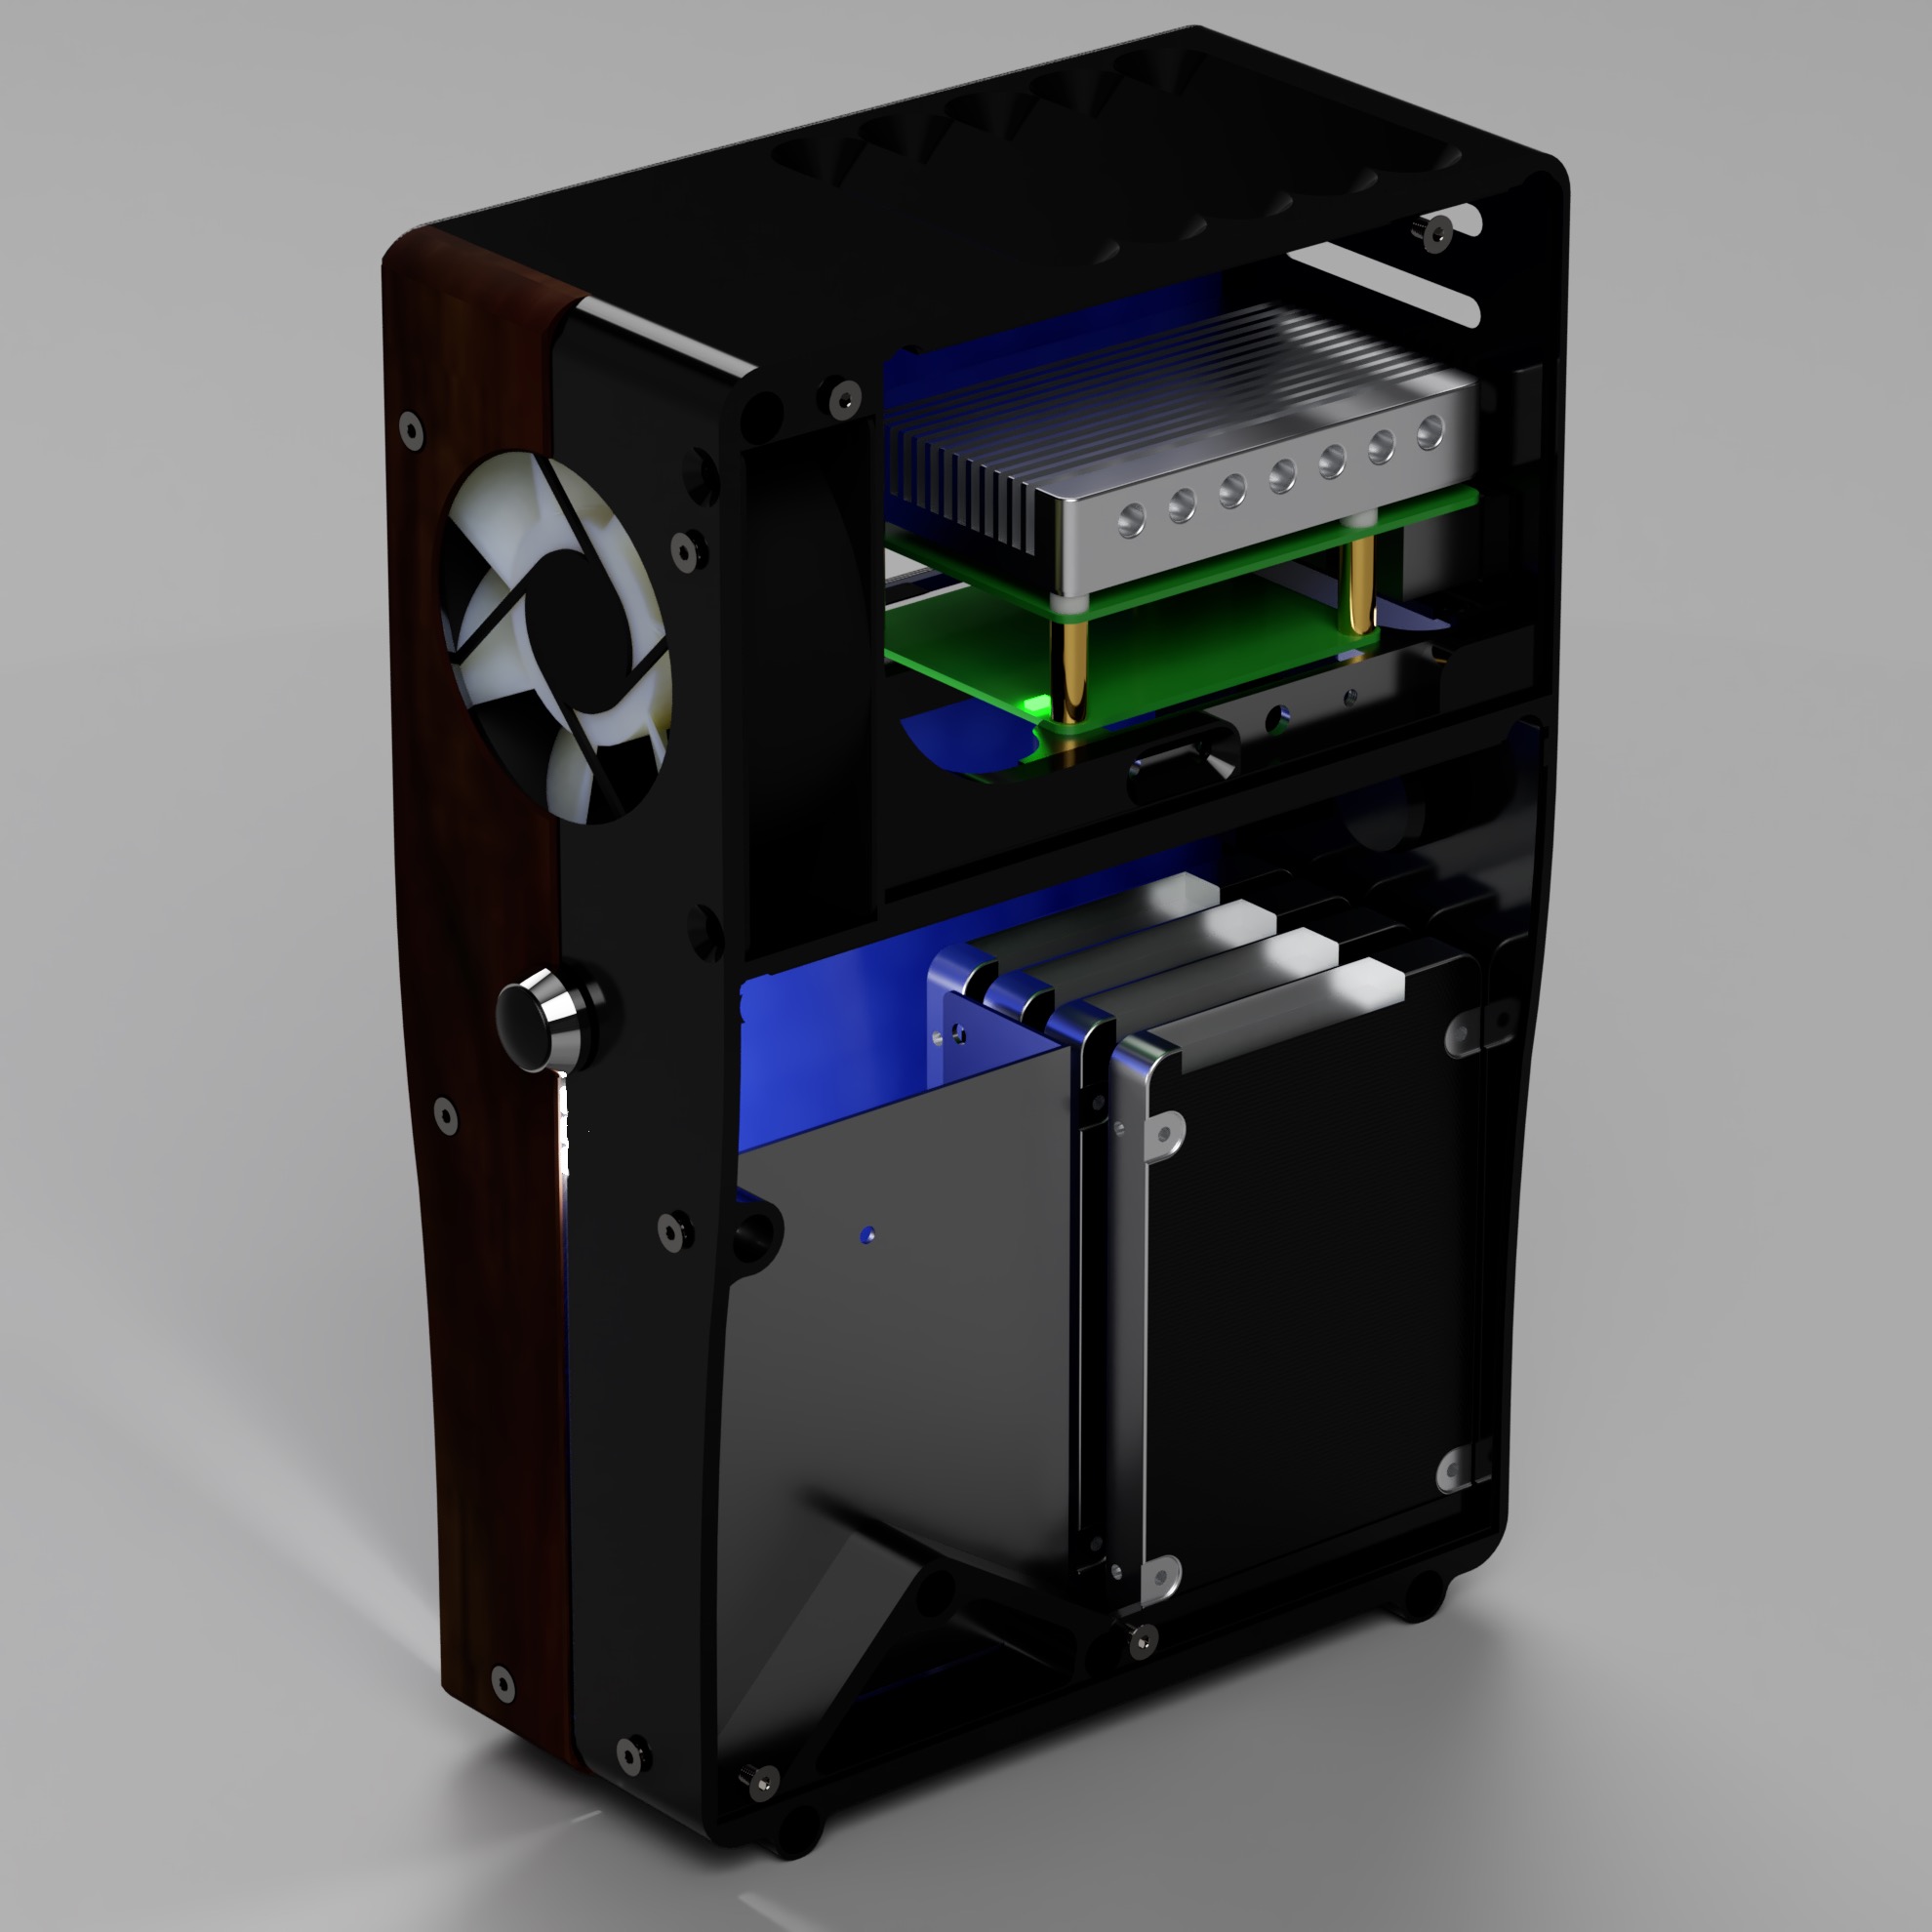
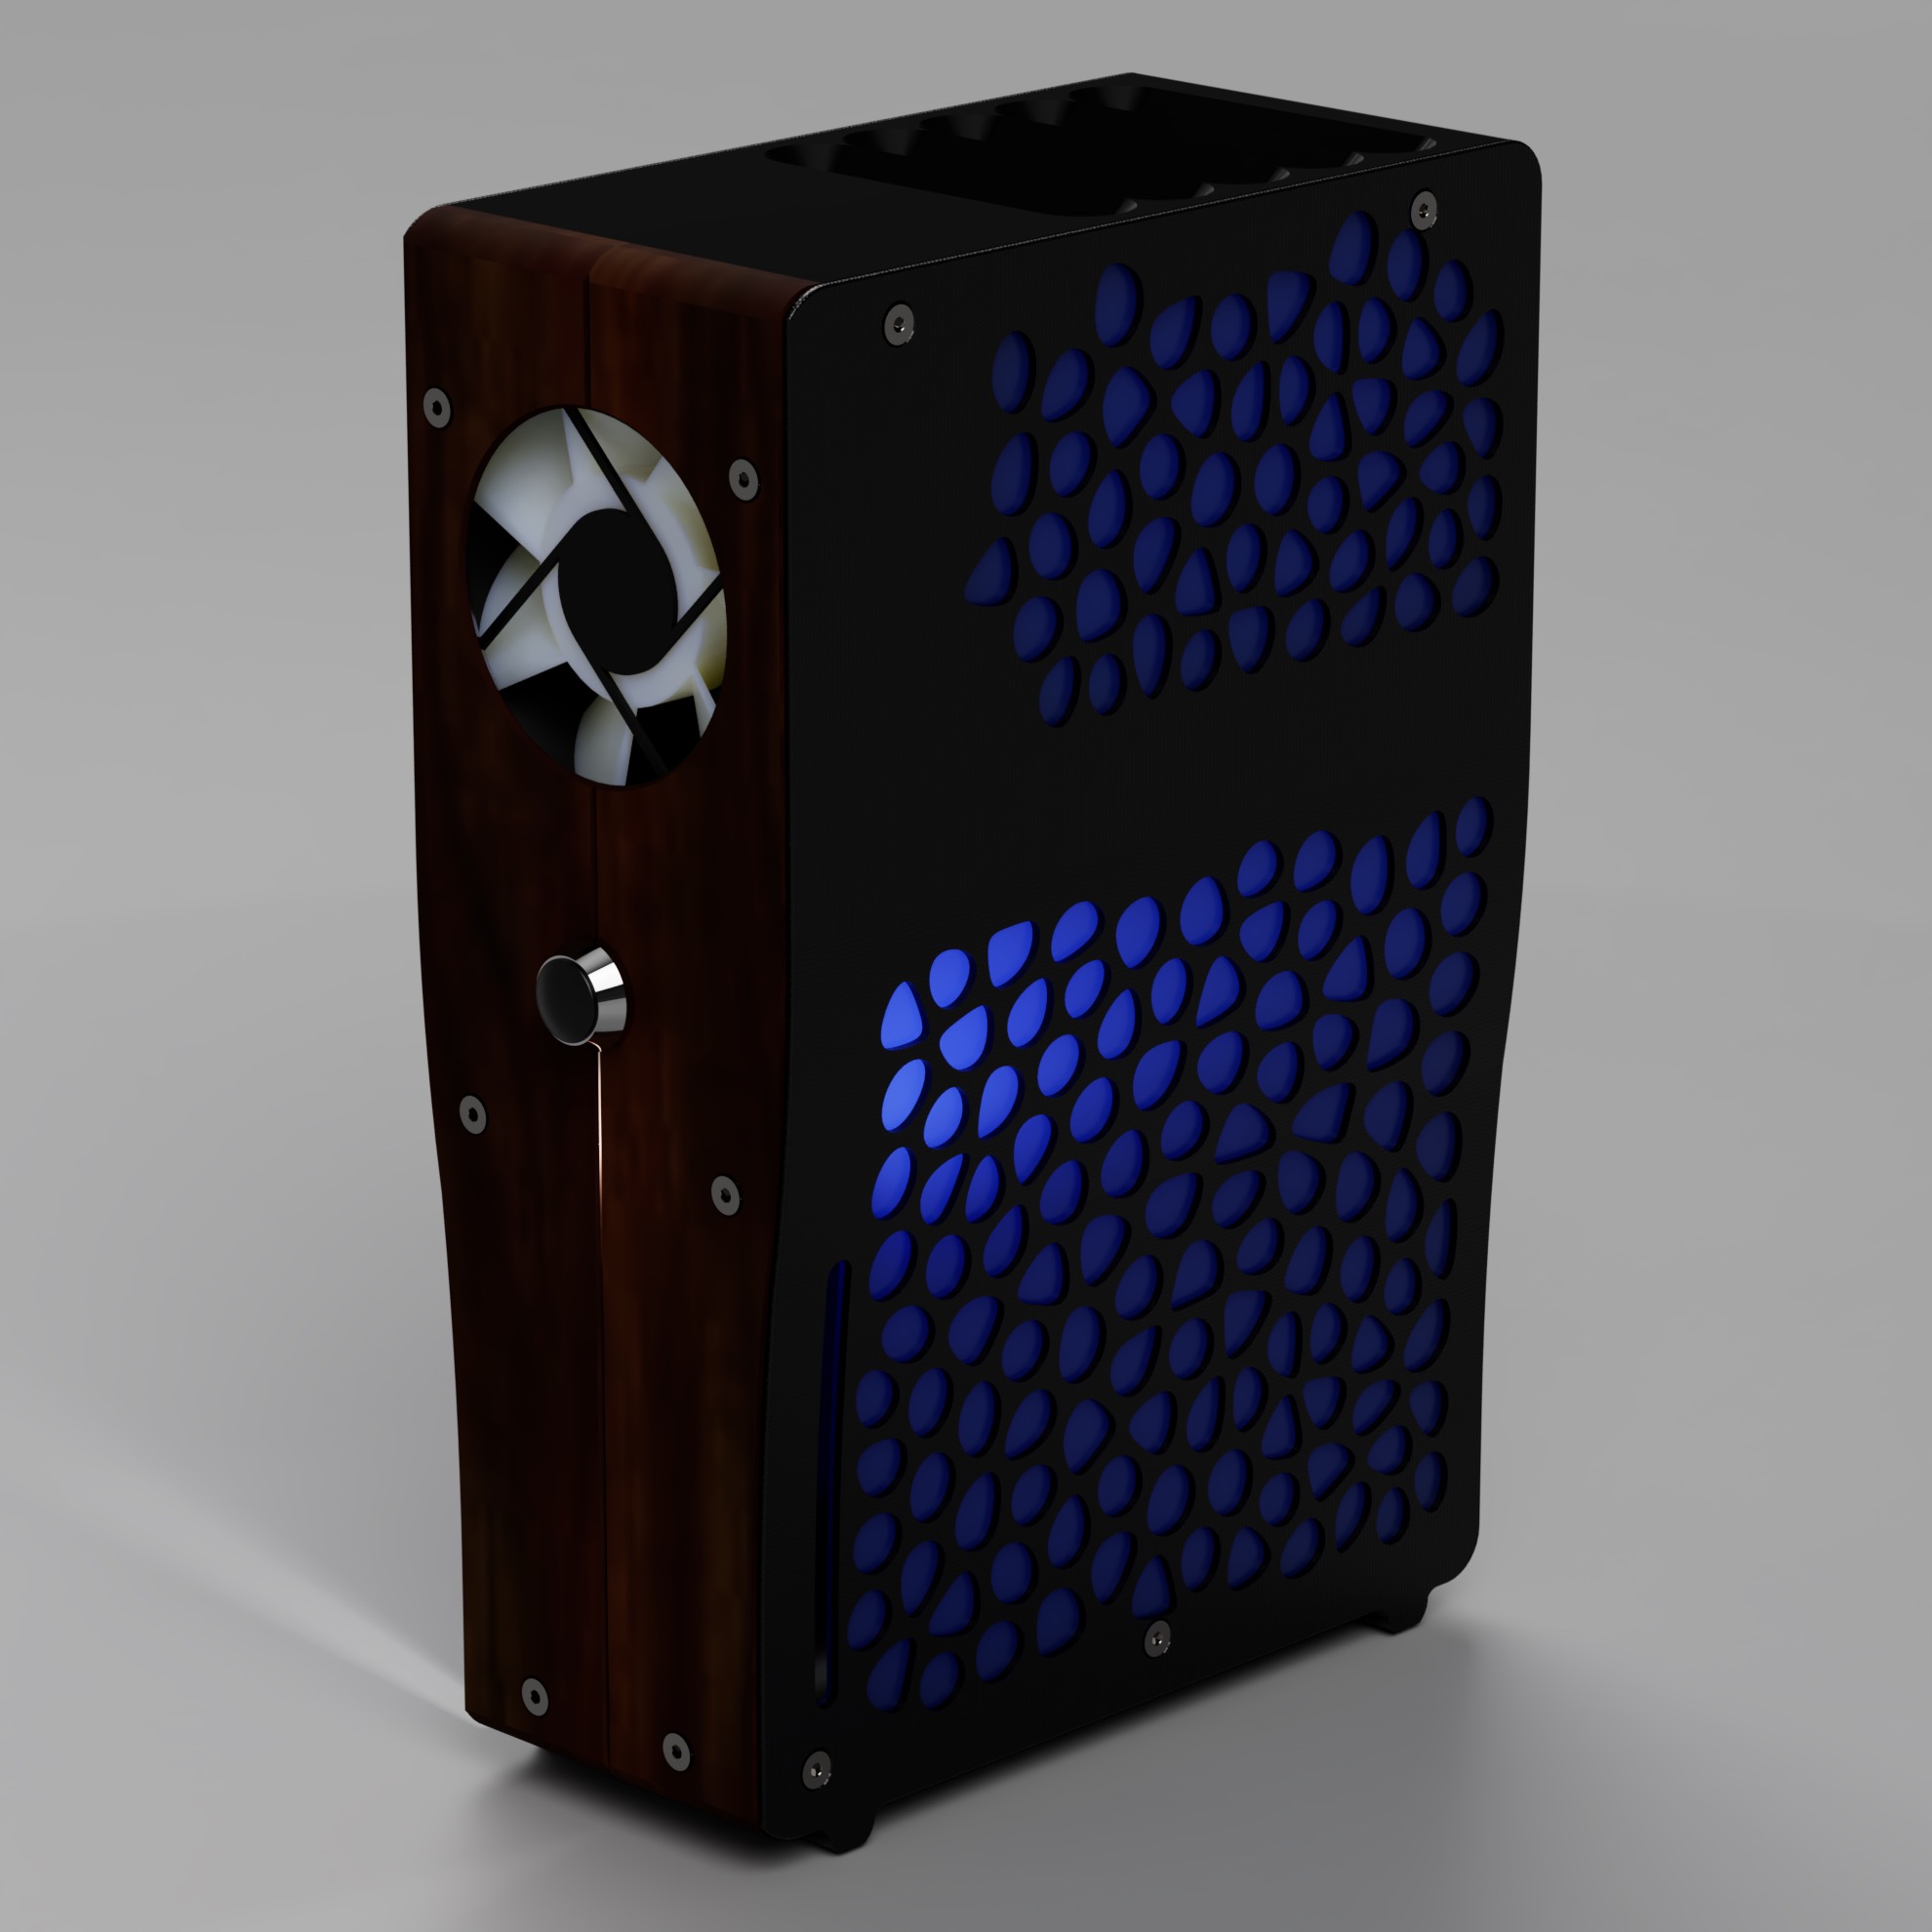
The first versions of the design were focuses on having a vertical case, sporting a hybrid choice of materials and a n open frame, which can be seen in these early renders:
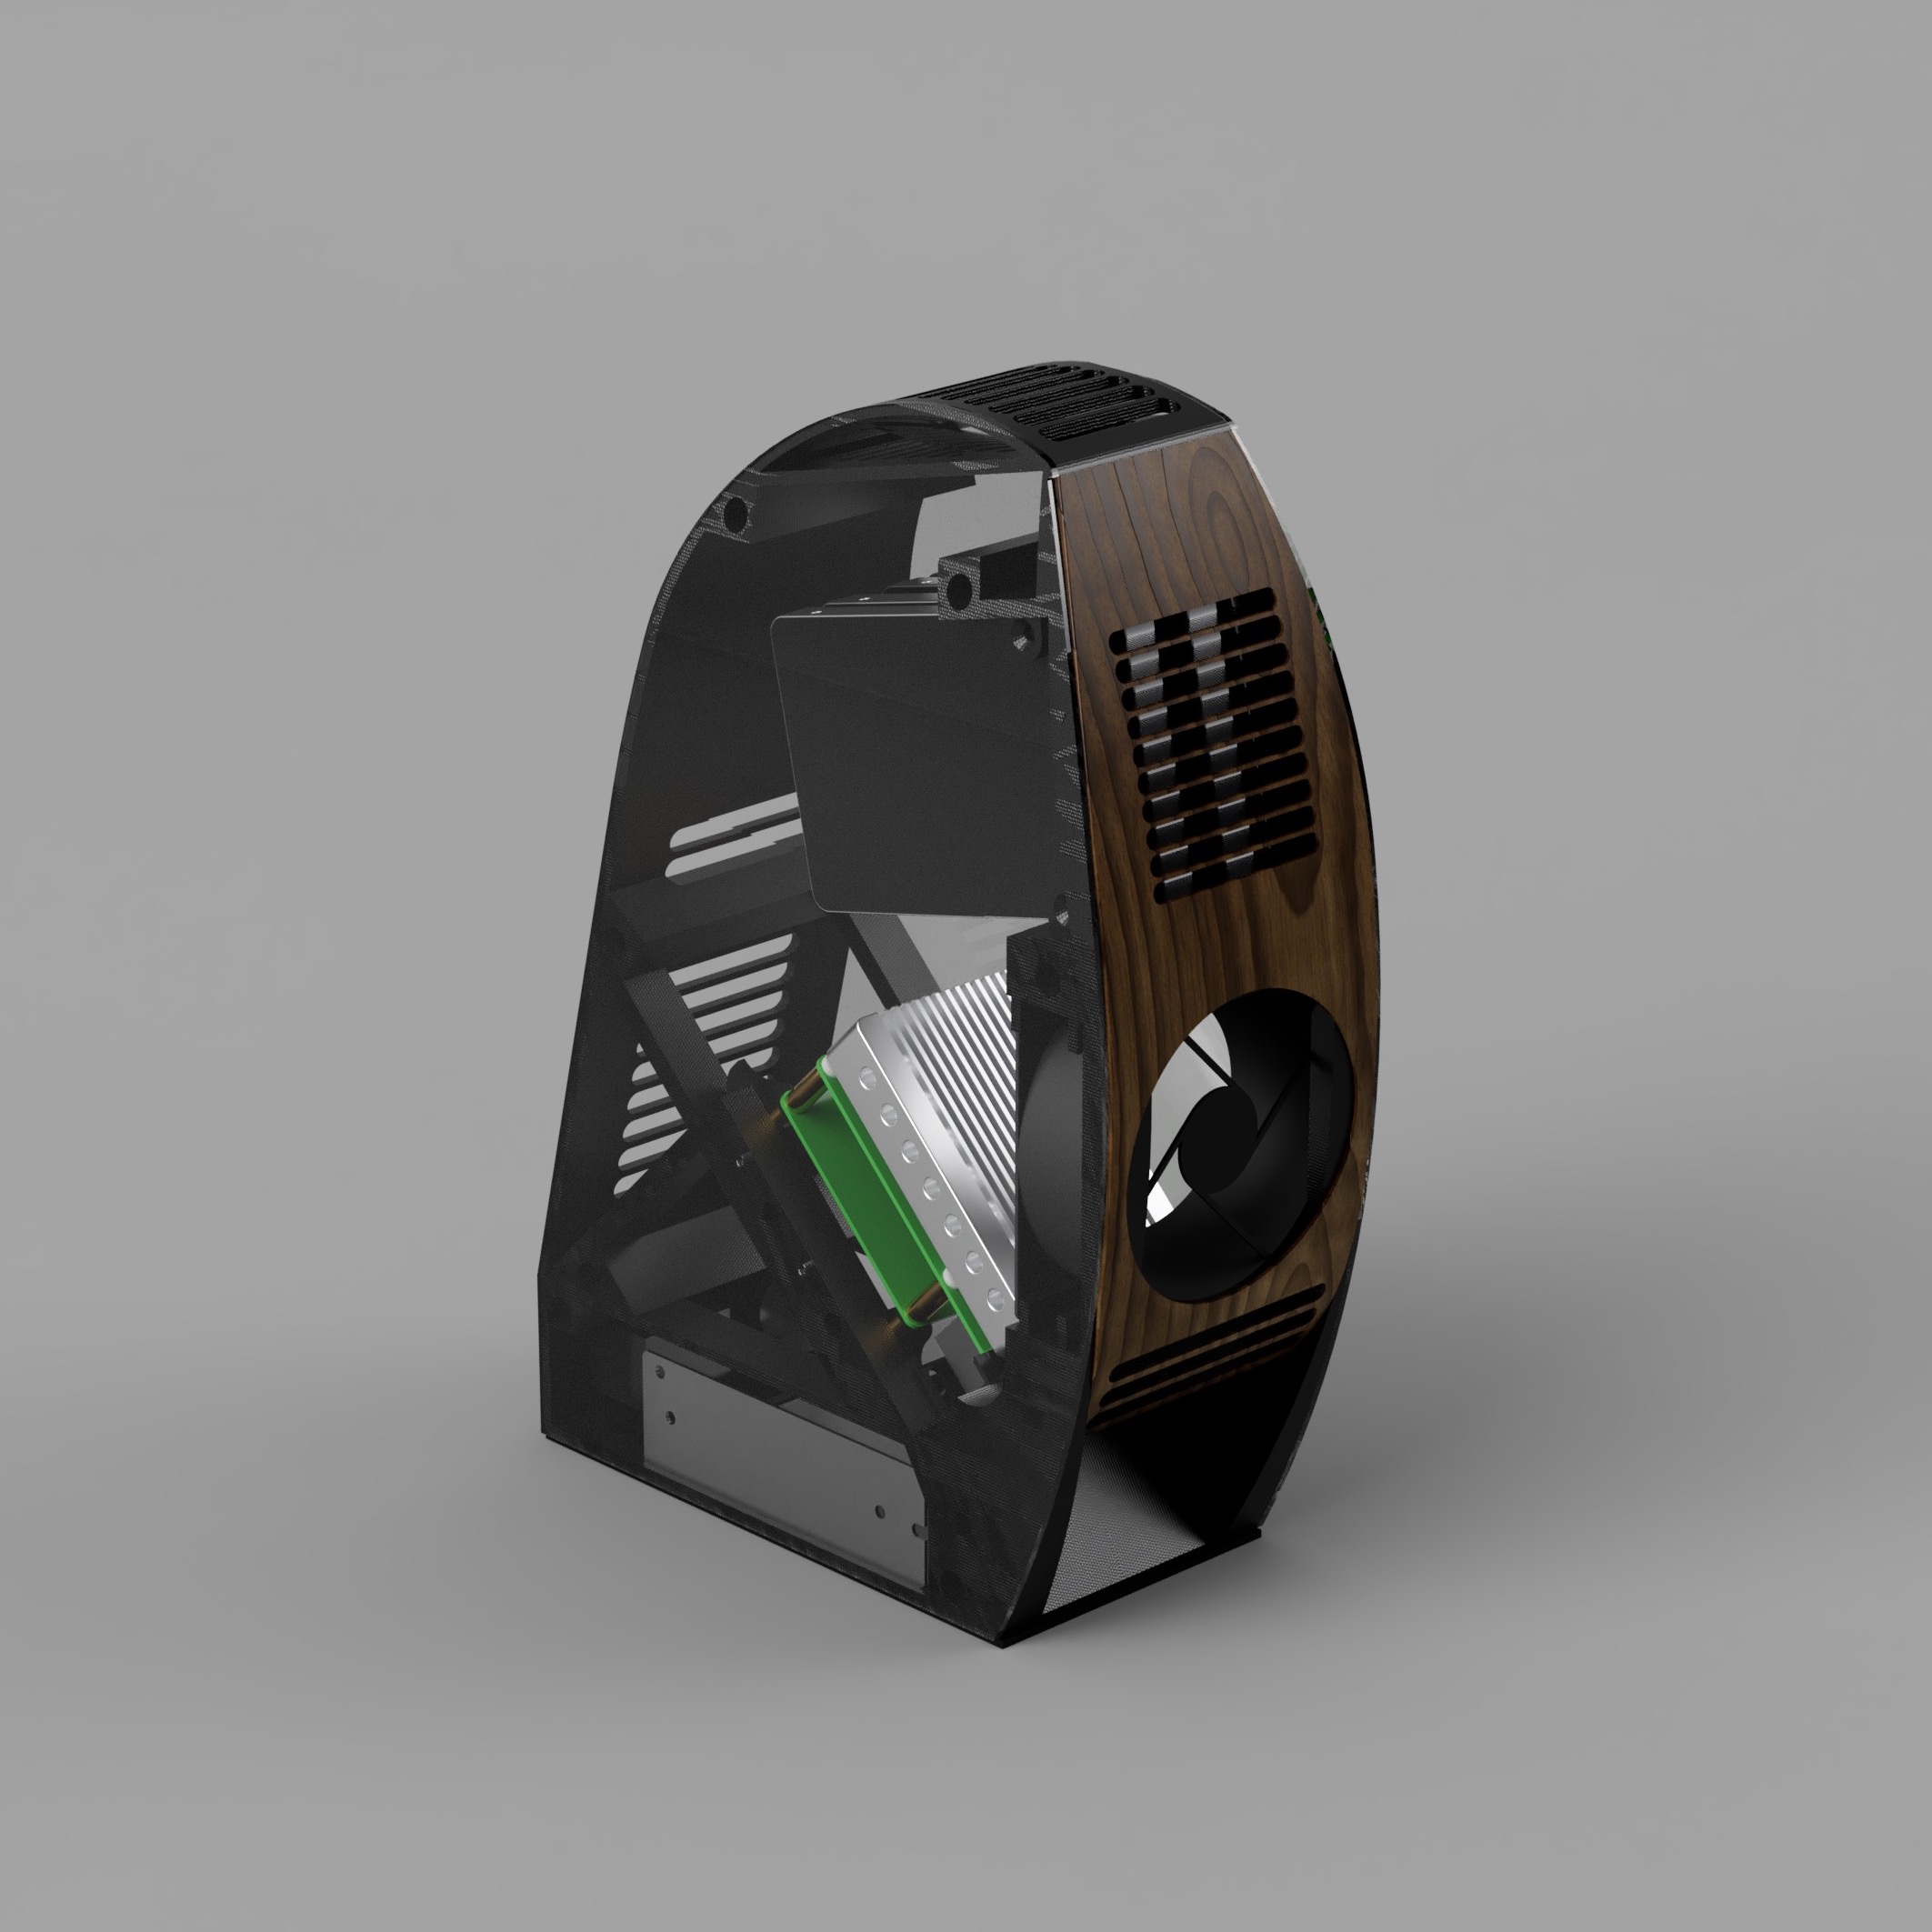
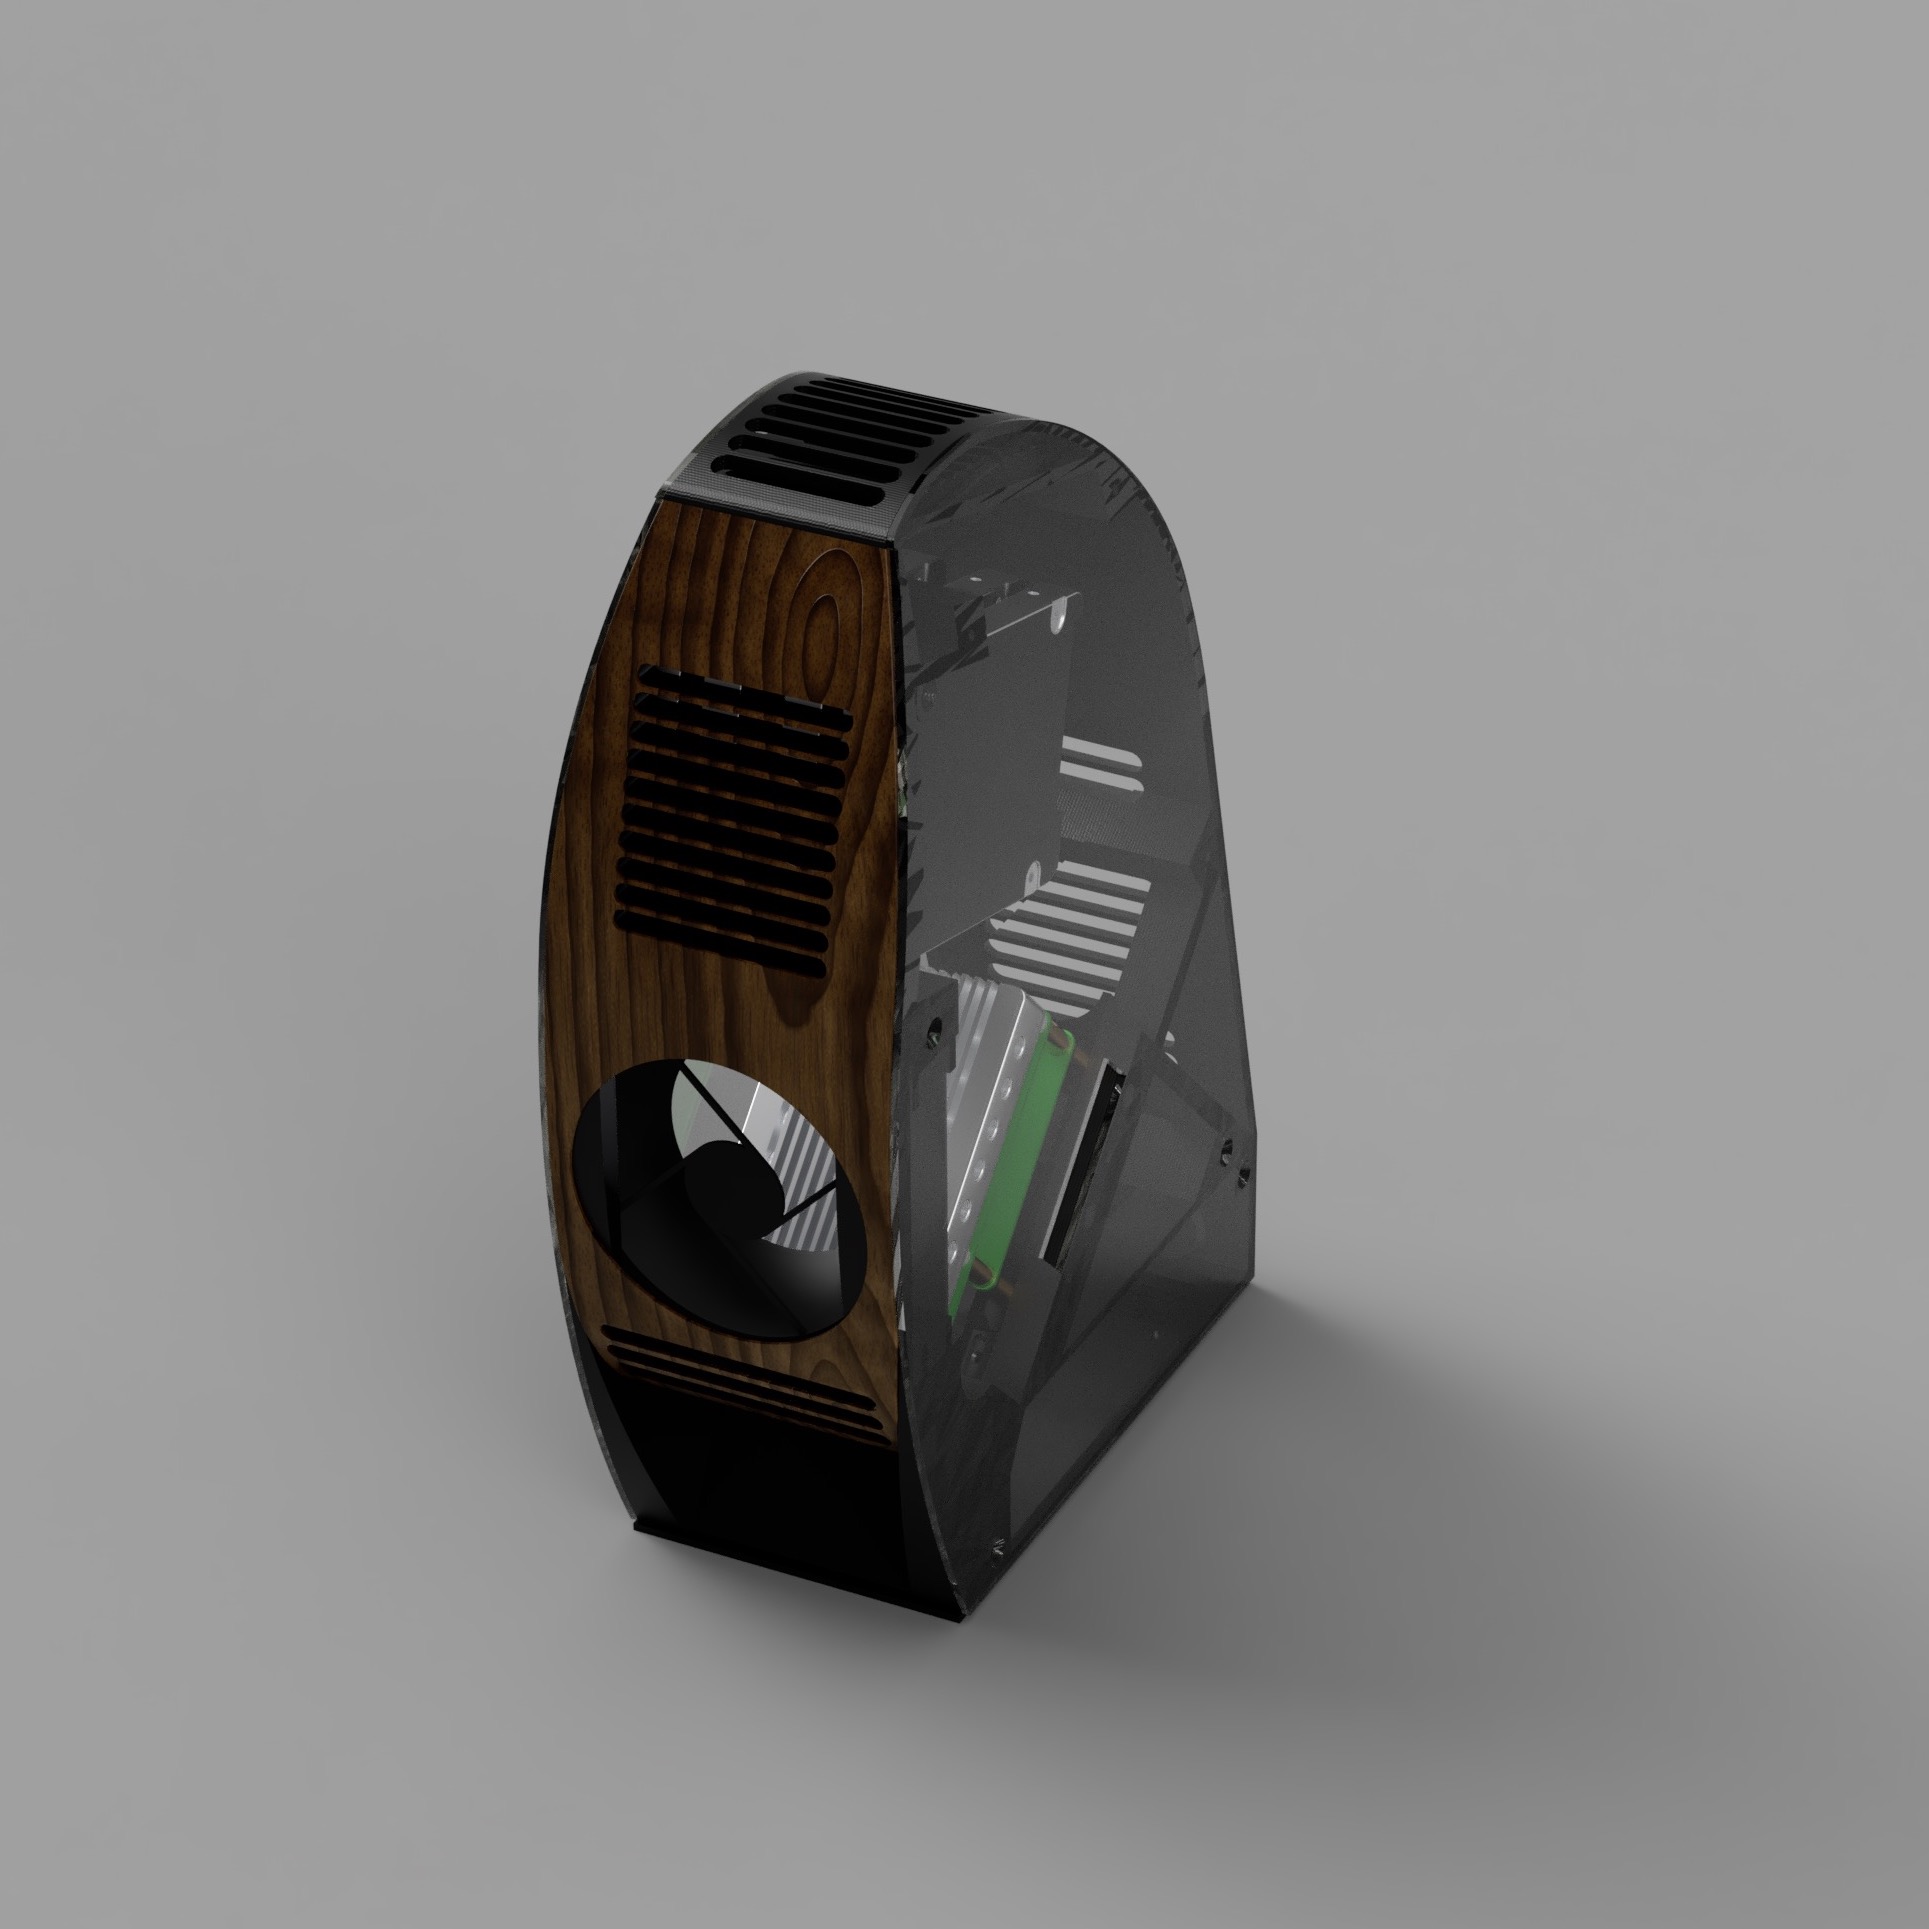

Version A and version B, slightly more slanted, using a mix of aluminium, plastic and laminated wood.
Note the presence of the fan (in different dimensions). This was required as the heatsink itself had the tendency to keep the average temperature too high for my taste, so it was introduced as default requirement.
As fancy as they could have been, they had some major issues. A lot of refinement and finishing was due to be made due to the presence of different material and especially in the open version, cable management and air/dust flow wasn’t entirely thought through.
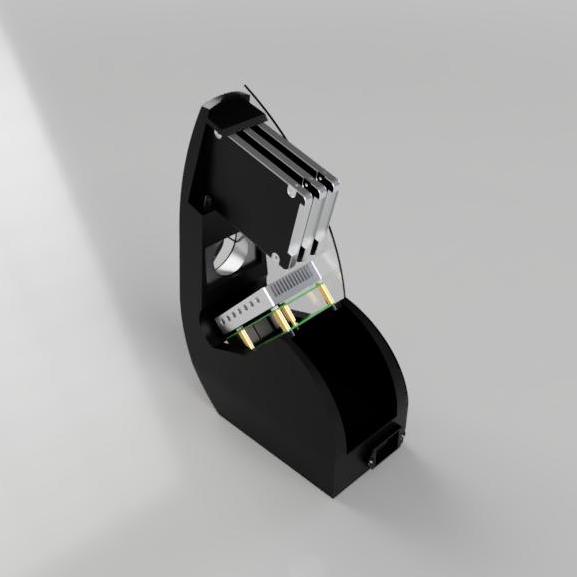
A subsequential version shows a full enclosed case with a better air flow and weight management:
Version C, fully enclosed and ready to be 3D printed.
Also, it showed a first draft of the transparent/light theme which will come back in the next version. This version had however some size constraints that made hard for me to be printed on my 3D printer, so this too was discarded.
So the first three designs (though in my opinion more elegant than the one I got to prototype later on) never got to be printed.
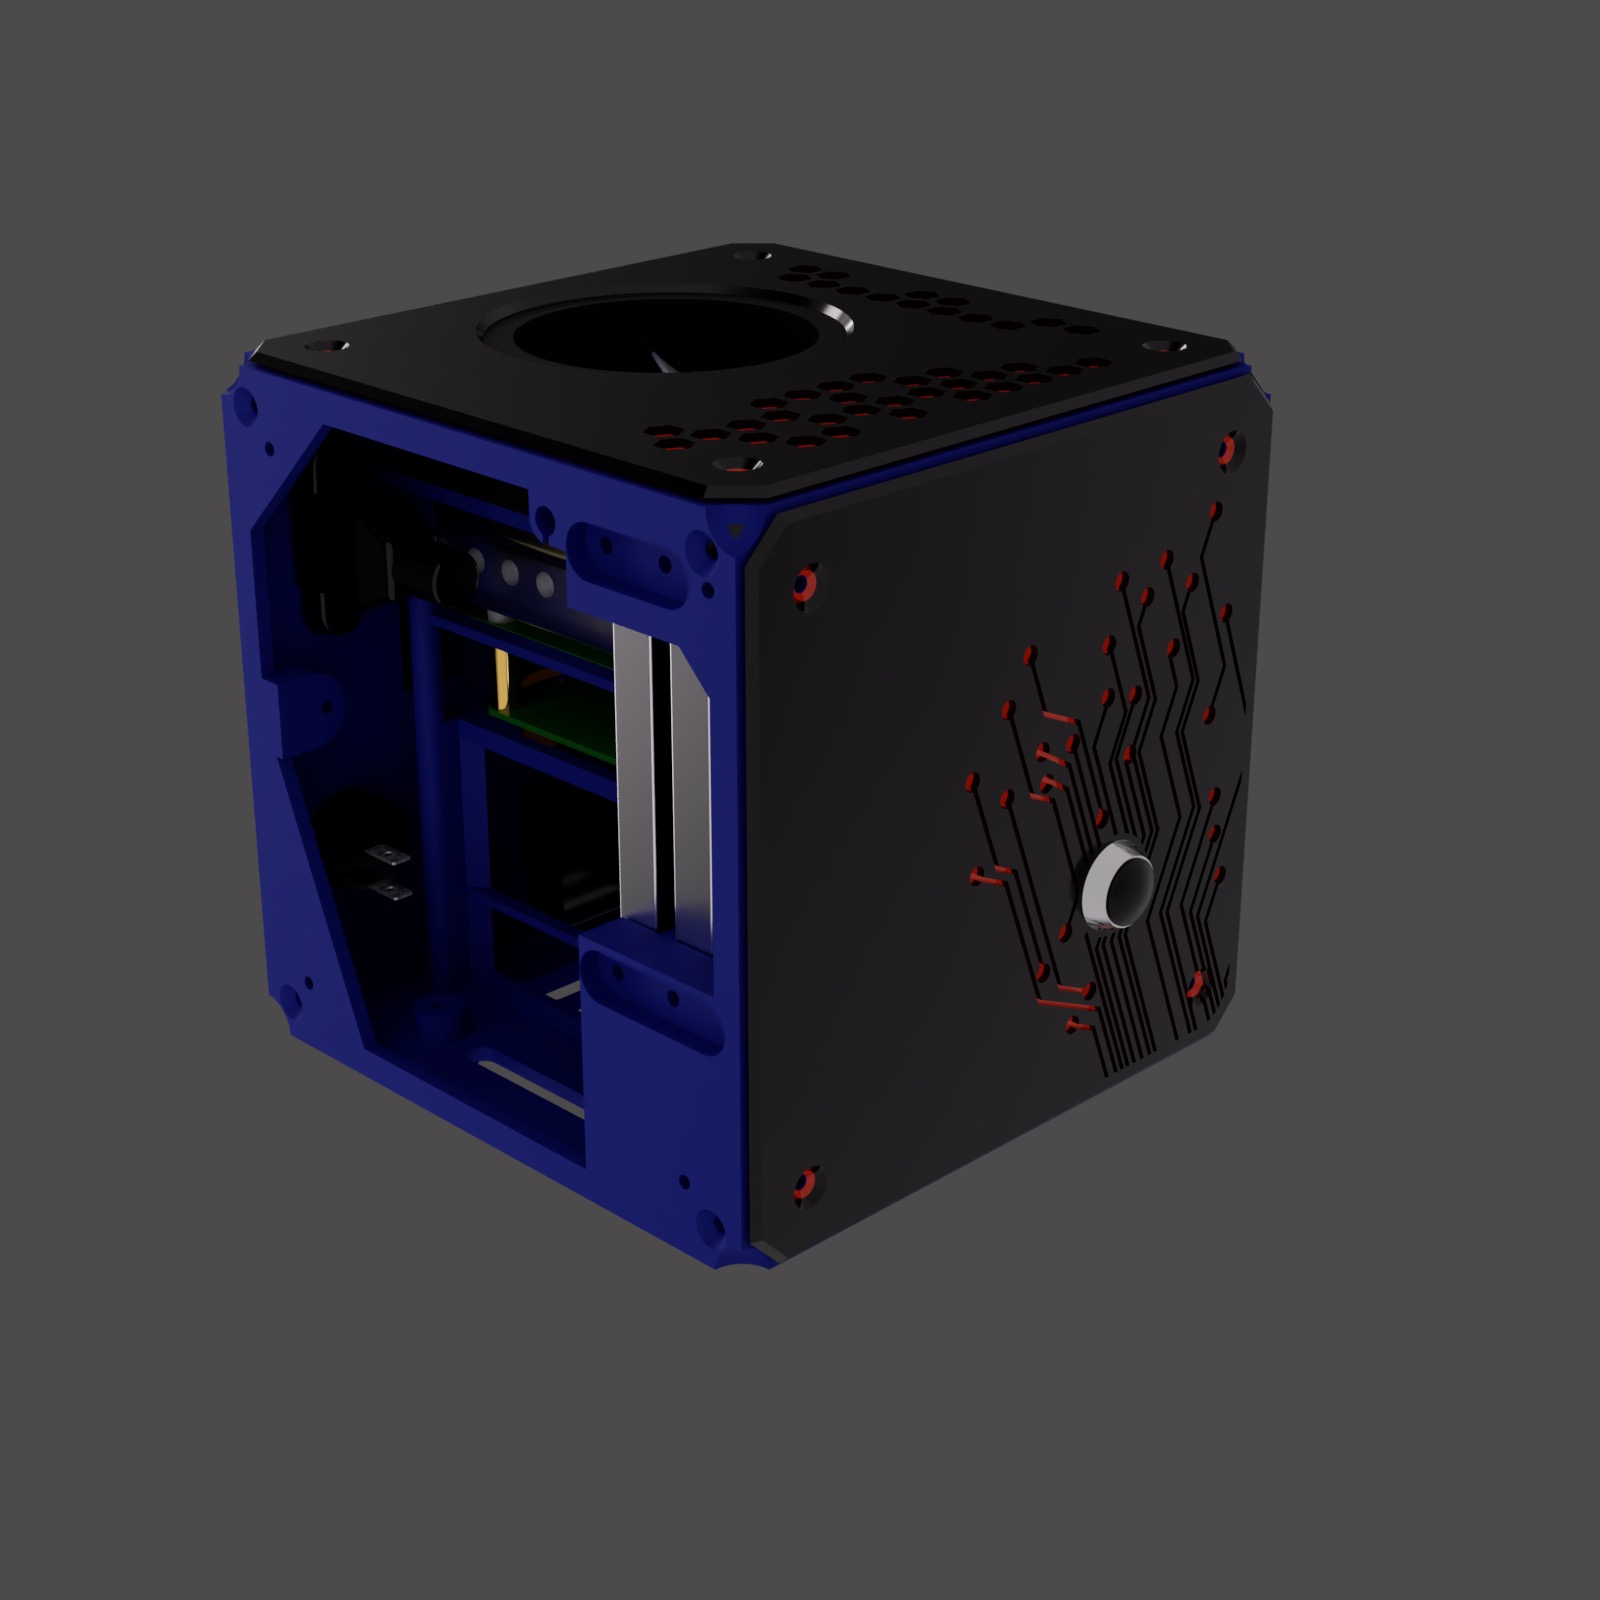
A flat cube
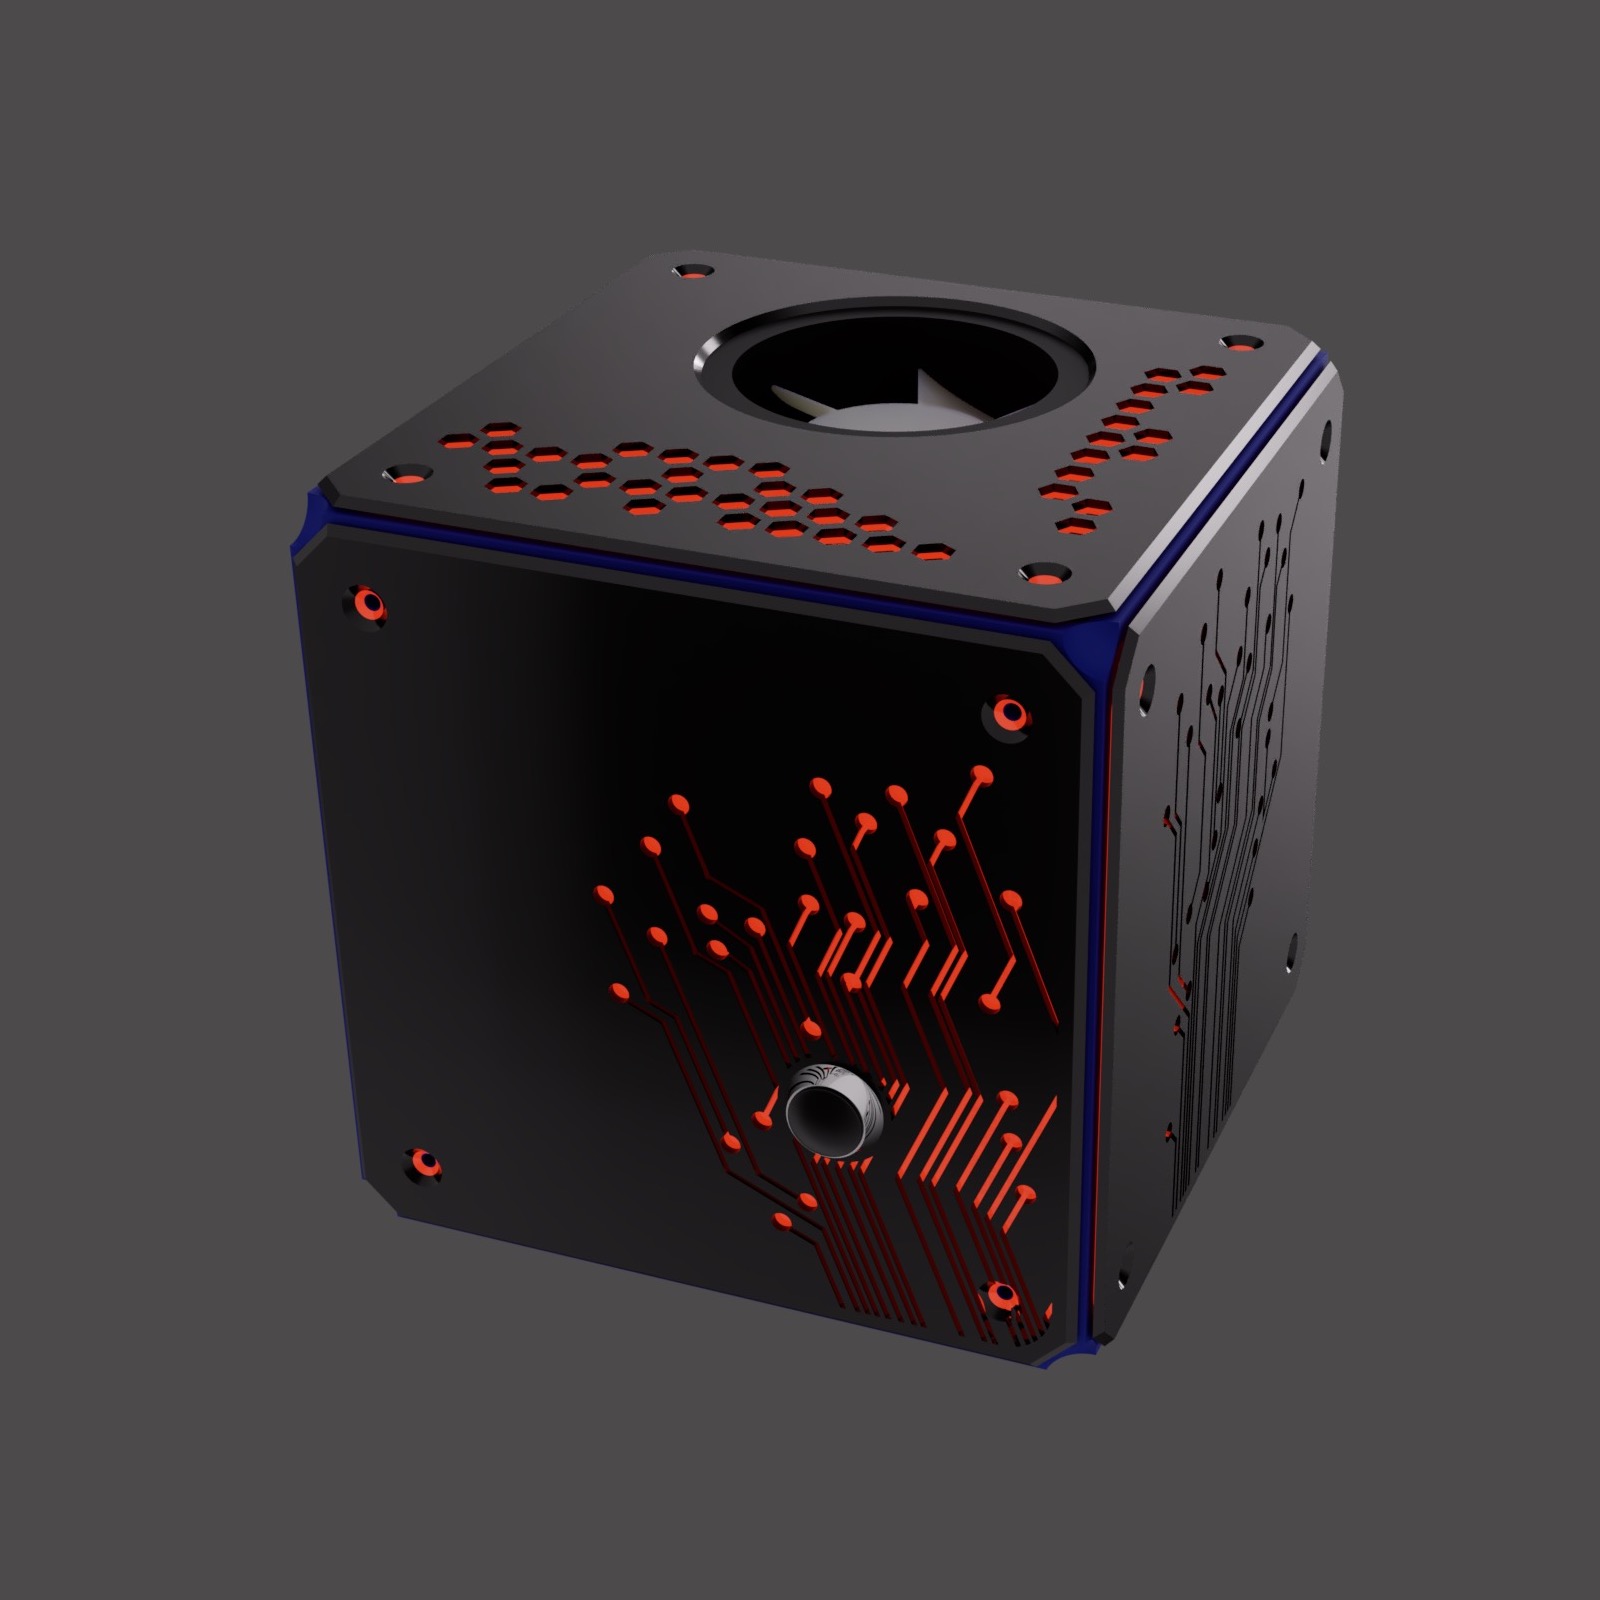
The next iteration went in a completely different direction. Rather than having a vertical case (Xbox style!) to lie near the TV bench, I decided to try design a version which could actually be printed on my 3D printer and double its form as a decorative item.
Picking up on the transparent theme from the previuos iteration, I made so it could have some sort of ‘night lamp’ effect and serve also as a decorative object on my desk.
It features a ‘flat’ design which can be printed easily in pieces and screwed together to form a cube. Several layers are put on top of each other to filter the light in different shapes.
- On the inside, a thick structure holds the development board onto the back of the machine, where all the plugs are firmly connected.
- Outside there’s a frame layer, made in matt PLA. It serves as a base and it’s screwed into a solid cubic structure.
- Then, a thin, red, translucent PLA which purpose is just to ‘colour’ the lights from the development board.
- Then a fully opaque, dark grey layer inlayed with ‘electronic’ flavoured decorations, constitutes the ‘skin’ of the case.
Here’s how it rendered on planning phase:


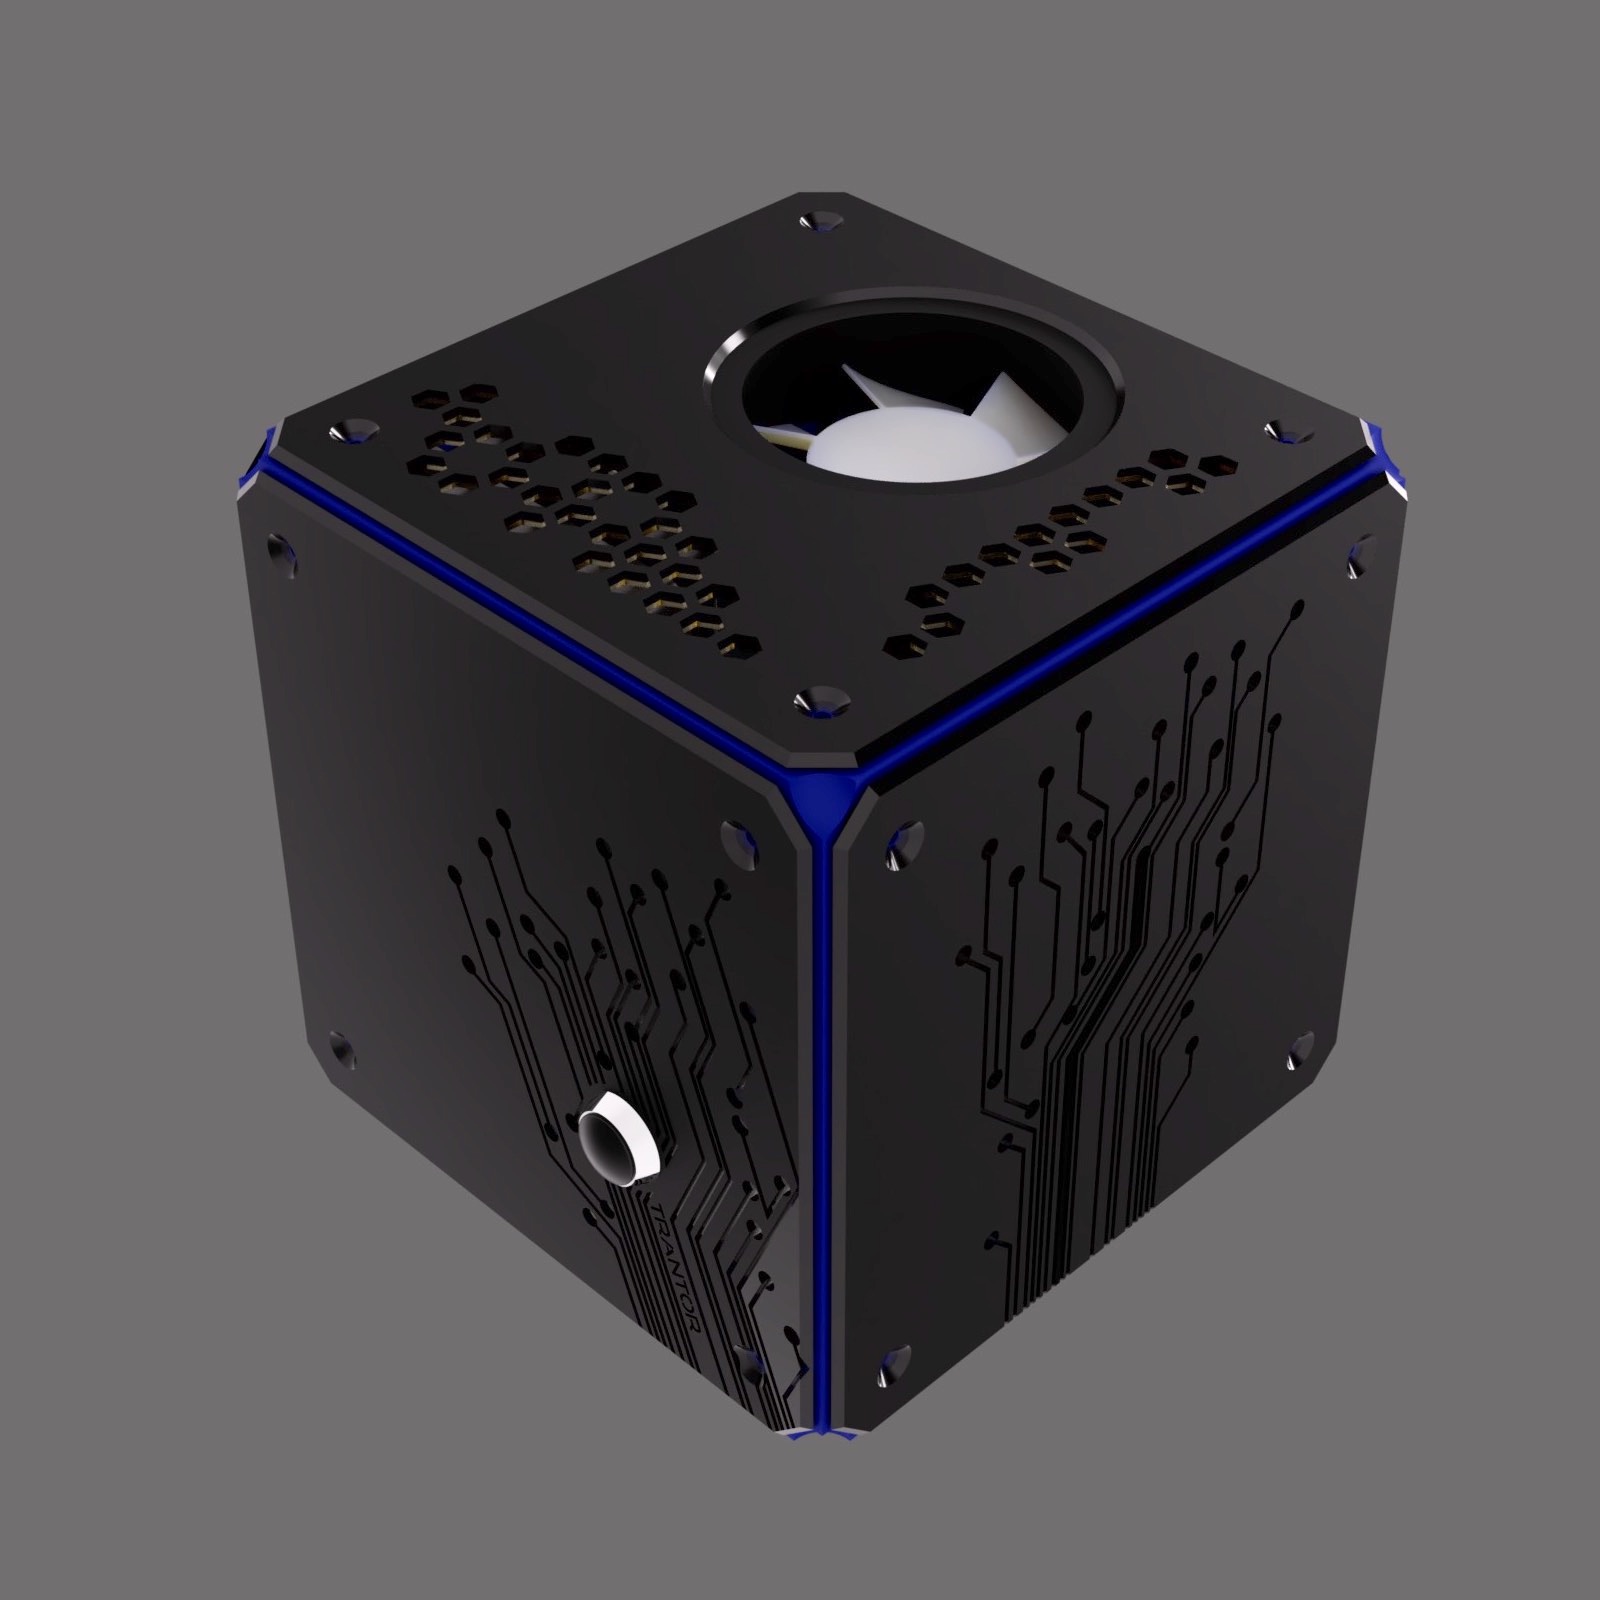
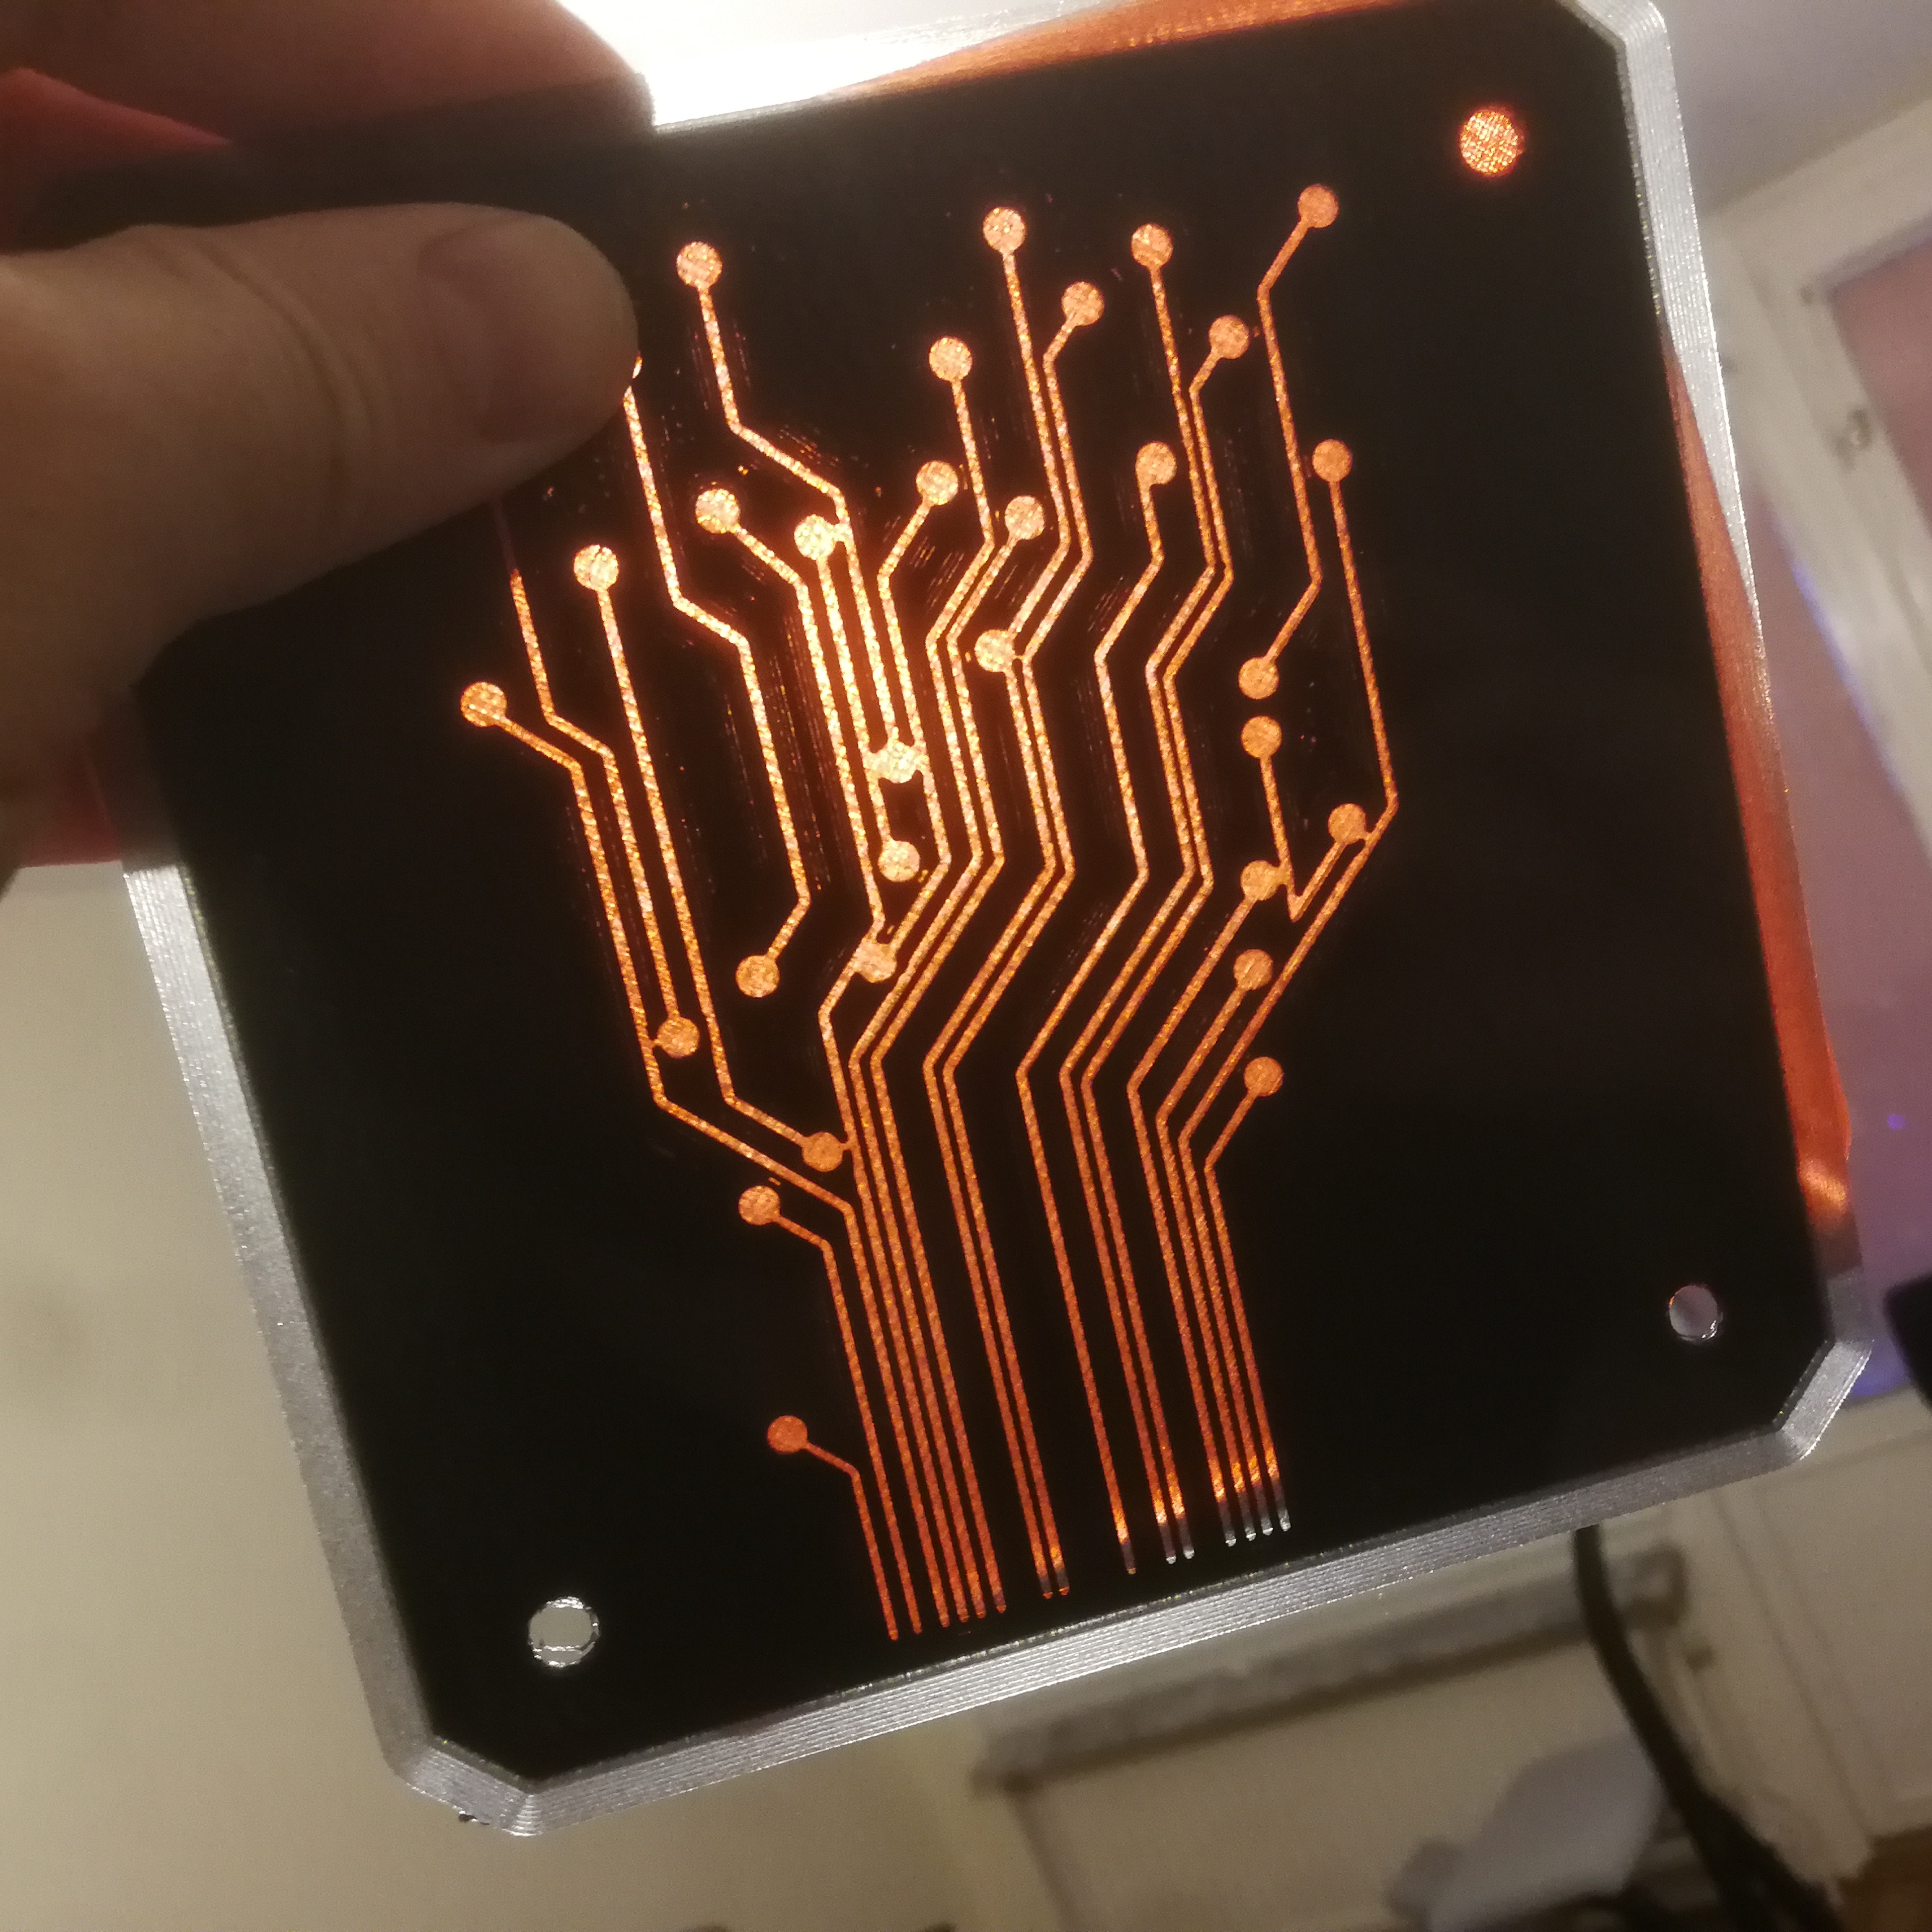
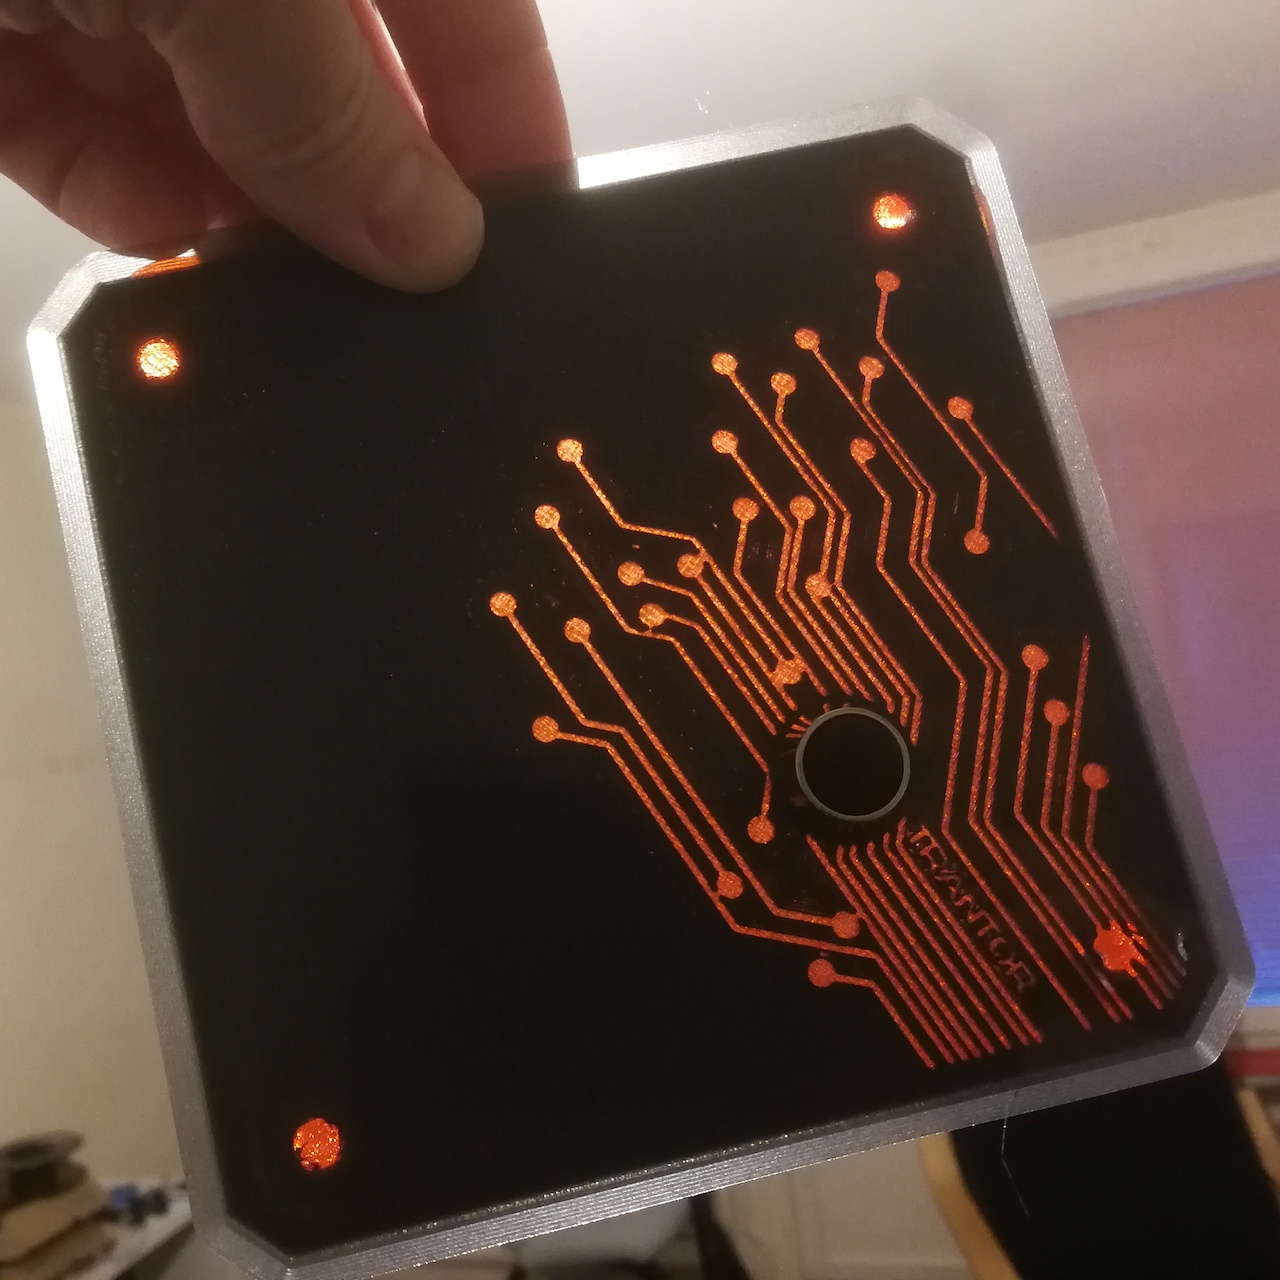
And in reality:
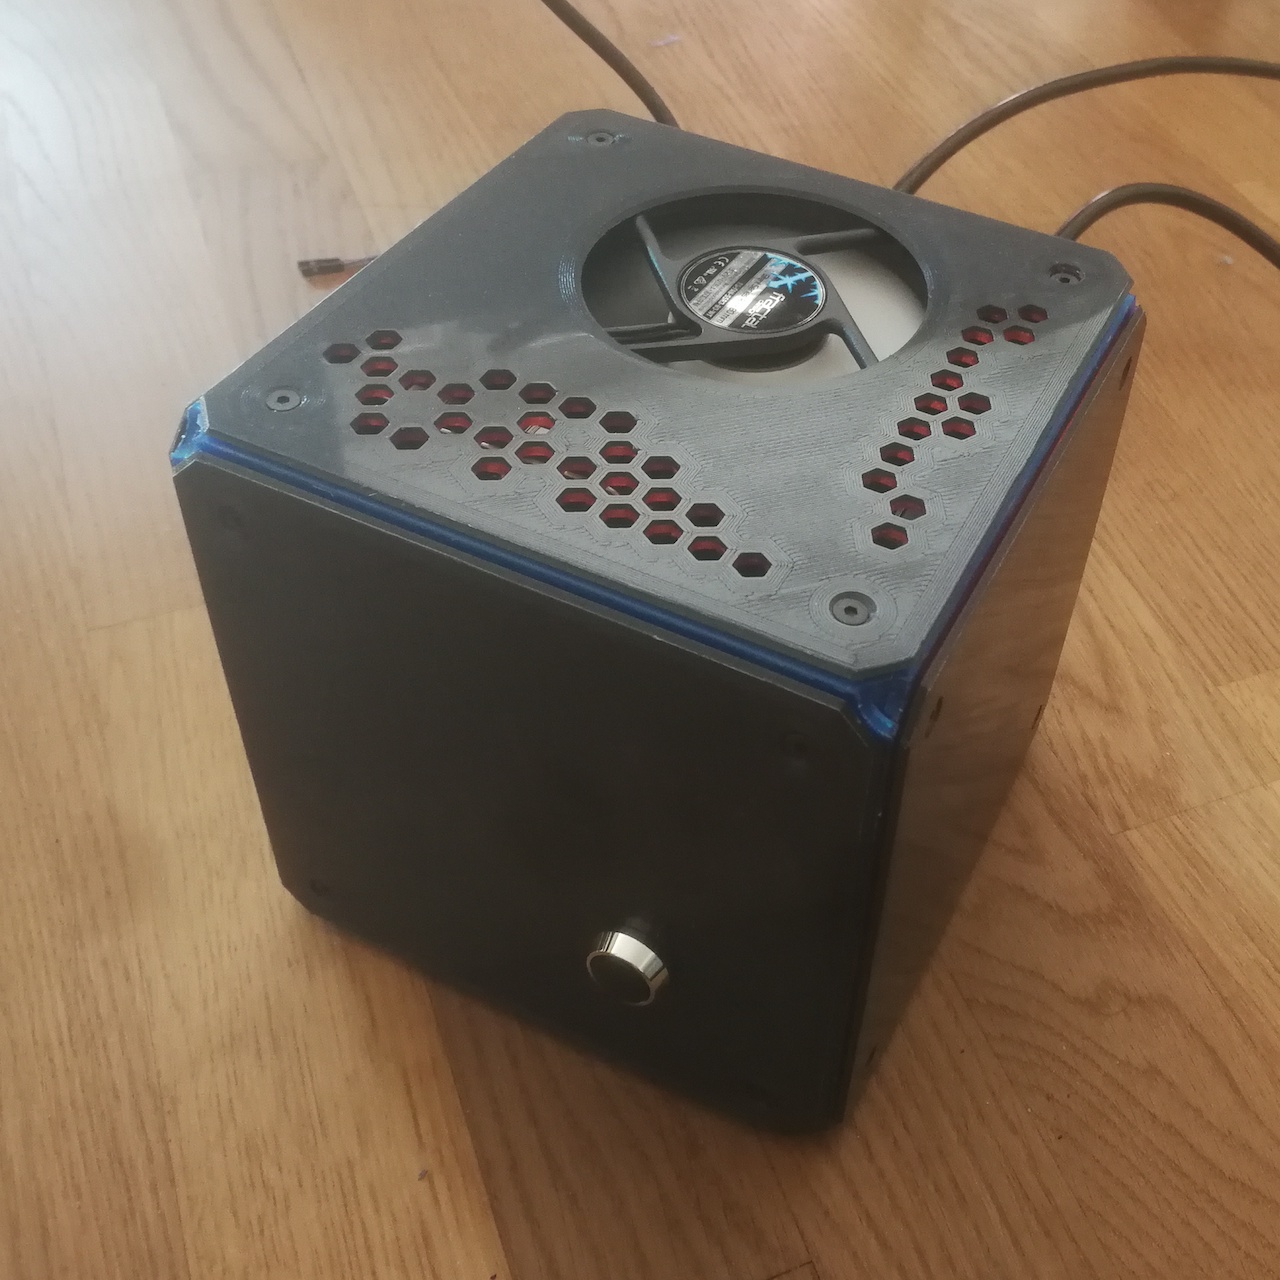
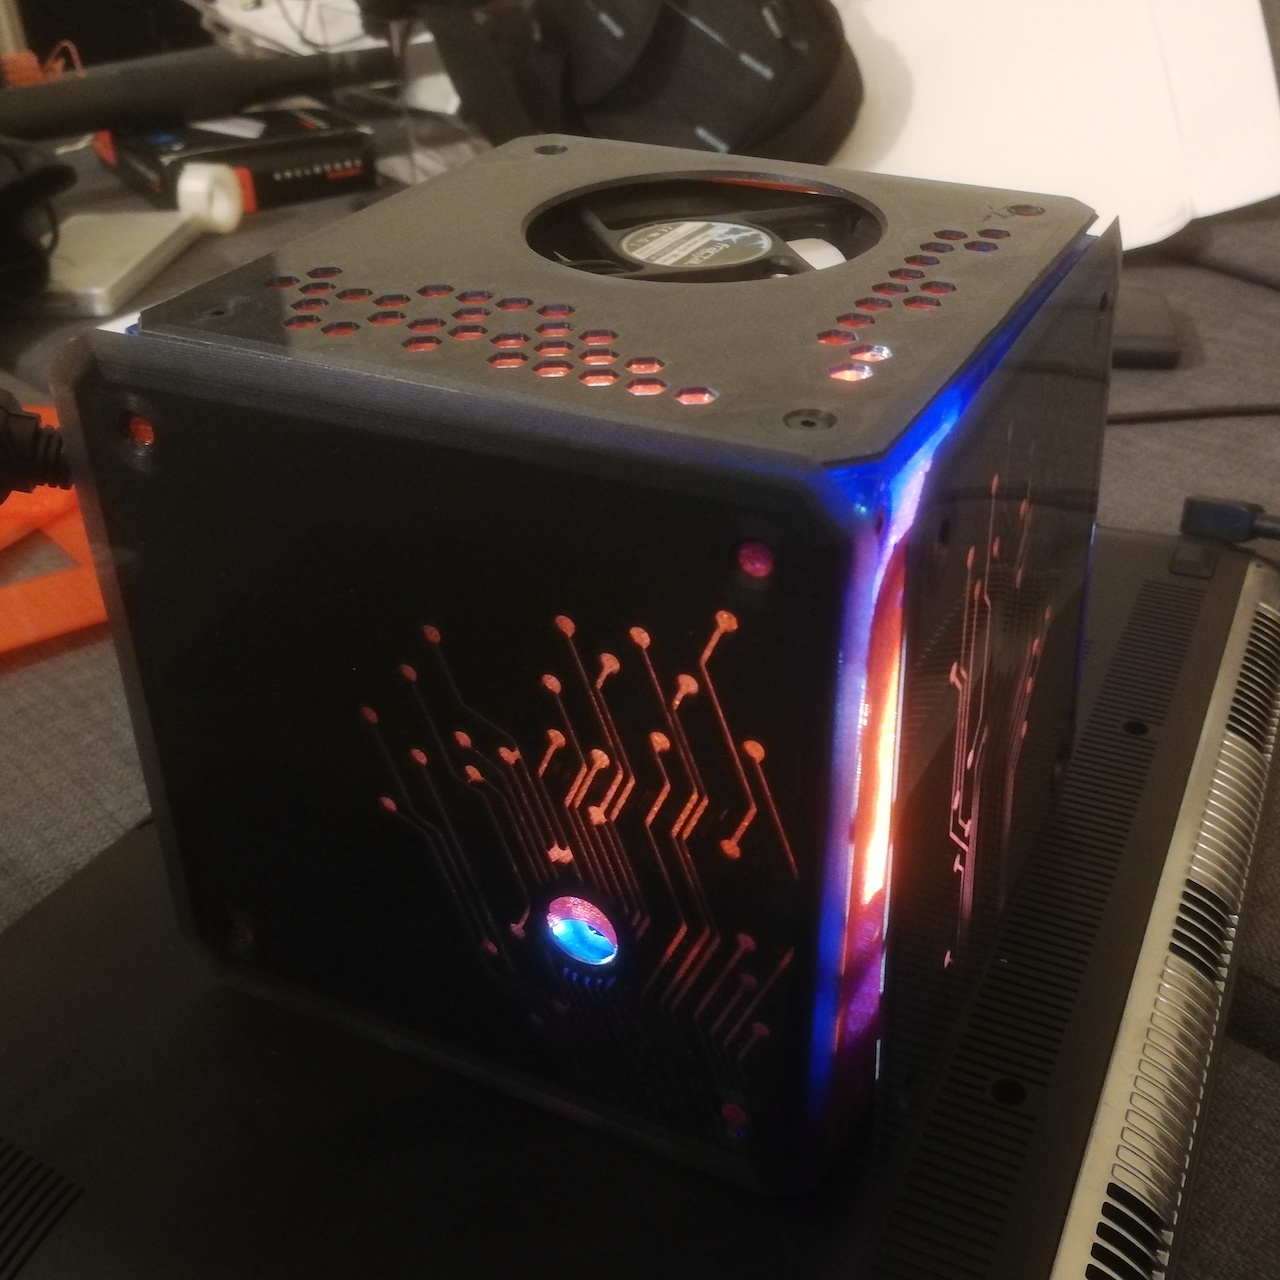
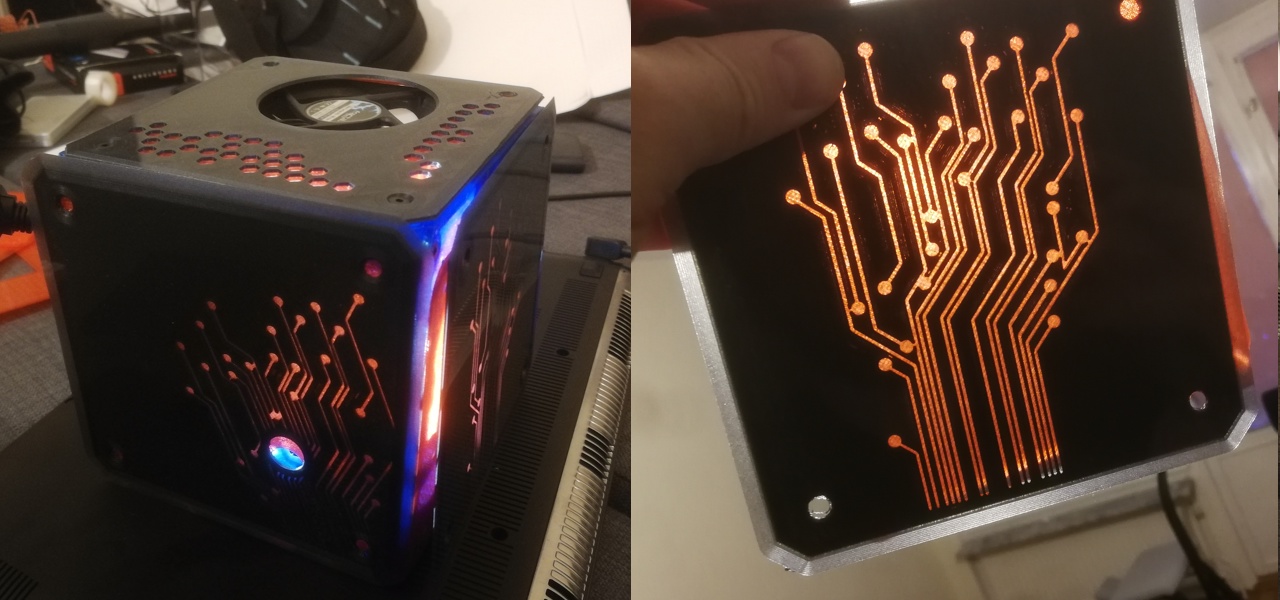
The results were as expected. Powered from 250V AC, and width a side of arund 150mm, it was a nice light spot to on my living room for a while.
Aftermath
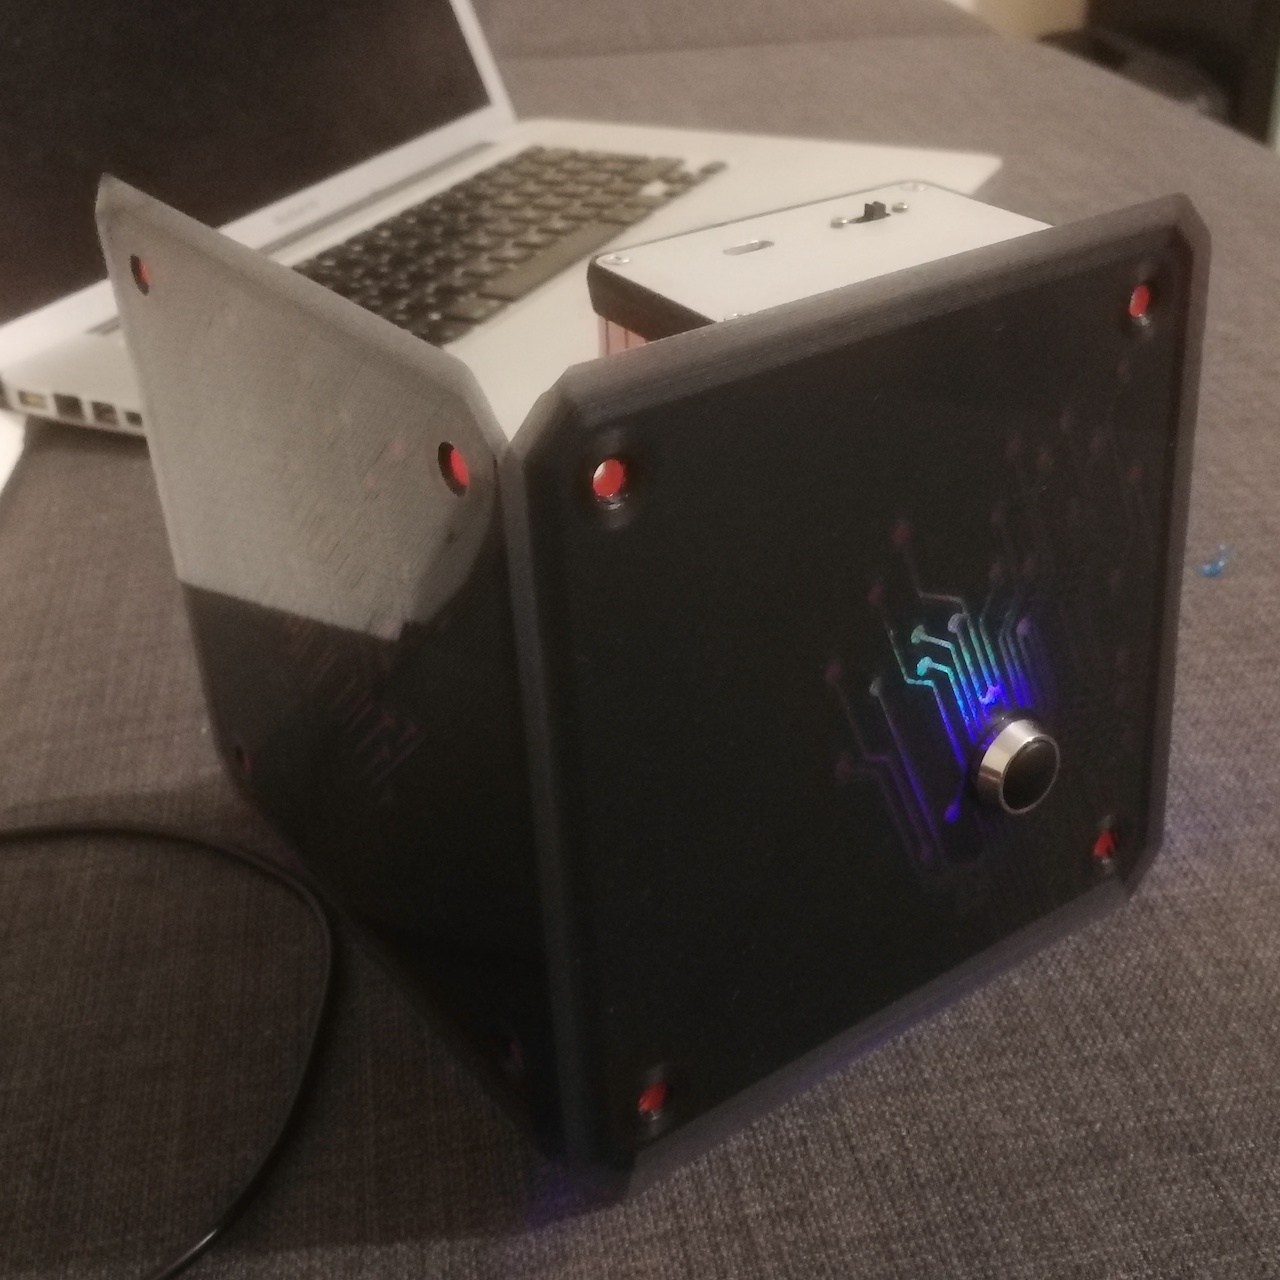
The NAS worked for a couple years without any issues. At some point, I decided to migrate my files back to a cloud provider. I didn’t have a case for having a NAS anymore. And since I don’t even have any need for the SATA hat, the case actually had run without disks for quite a while. Ultimately, the fan started to get noisy, or I guess the original requirements changed a bit, or I just gotten tired of seeing this chunky cubic, half empty machine on my desk. Eventually, I decided that it wasn’t worth having a machine all day in plain sight with a less than silent fan, and I decided to downsize the project even more.
At the time of writing, the M4 runs on the secluded intimacy of my main PC’s case. Check it out.
Software
This part is controversial. After a bit of trial an error, the Steamlink app not being supported (sigh, it’s not a RaspberryPi) and having I migrated all my files to other cloud providers with much better luck…. the original plans much changed after a couple of years. So I’d given up to having some of the functions I was looking for in the first place (:-D) and finalized on a rather simple setup.
Now the ‘NAS’ is more of a home automation system running on pumped up development board. The board now hosts just Armbian with dockerized versions of Home Assistant, a service supporting the ConBee II adapter to which I connect all my Zigbee devices, and that’s it.